


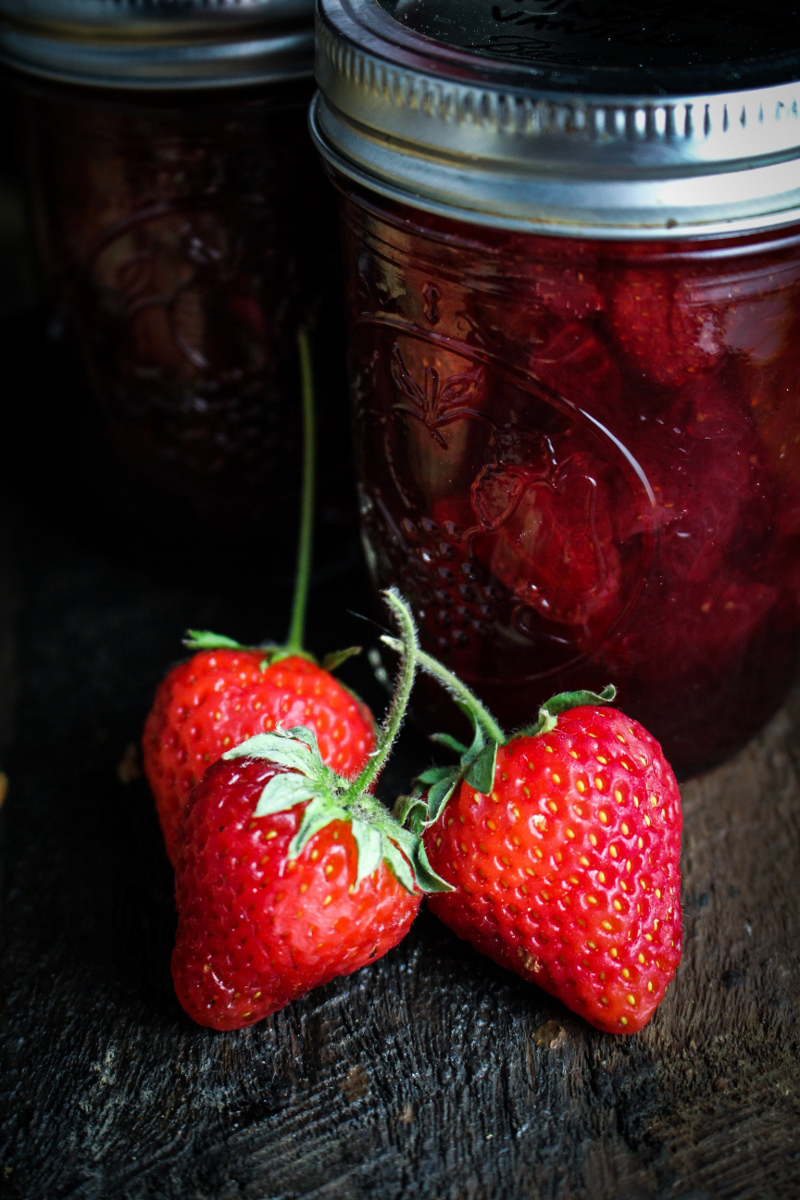
The first thing I did with our strawberries was make jam. I know that for many people, jam is sort of a last resort thing, something they turn to when they’ve run out of ideas and their fruit is on its last legs. But I’ve been dreaming about filling my pantry with jars of strawberry jam, made from our very own strawberries, since the middle of winter, so for me getting a batch of jam on the shelves was my first priority. Canning still makes me a little nervous, but with every batch of preserving I get a bit more confident. This time around, I veered ever so slightly from the recipe I was using, adding a little bit more sugar (which, from what I understand, is basically always safe to do), and a whole vanilla bean. The resulting jam is sweet but not saccharine, loose but not runny, and very elegant.
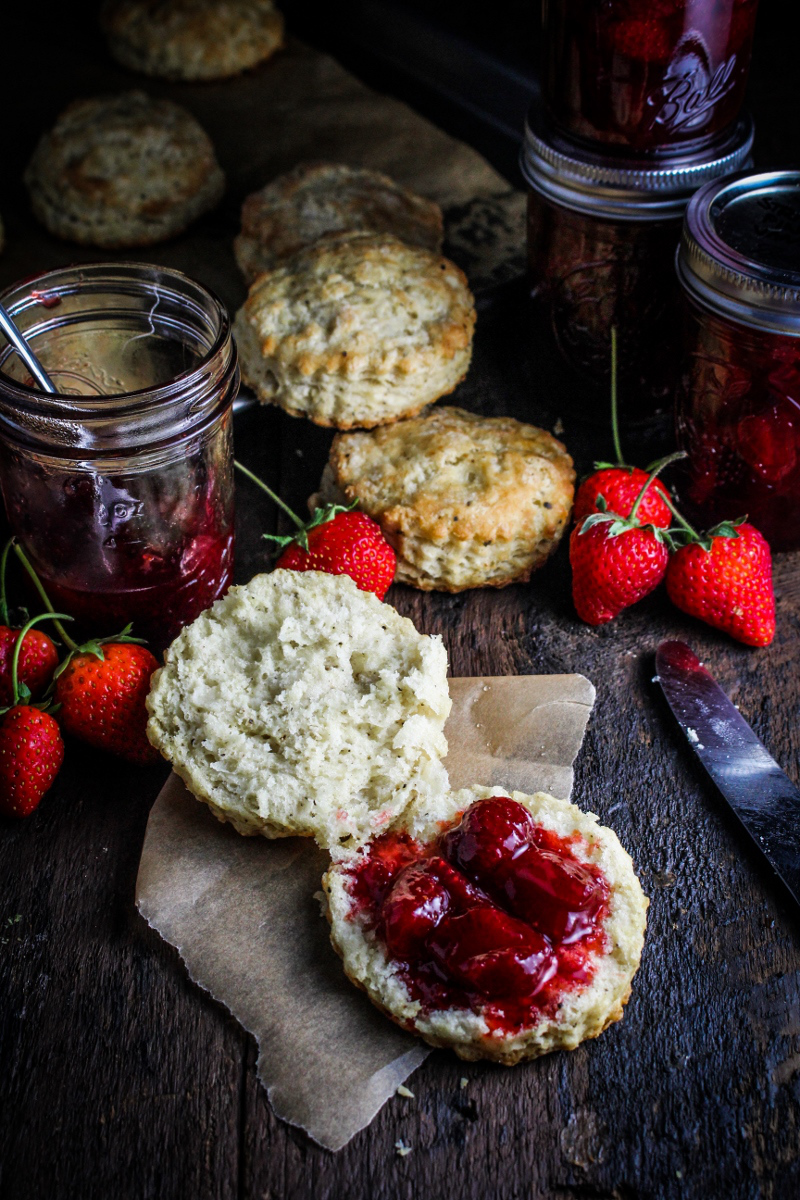
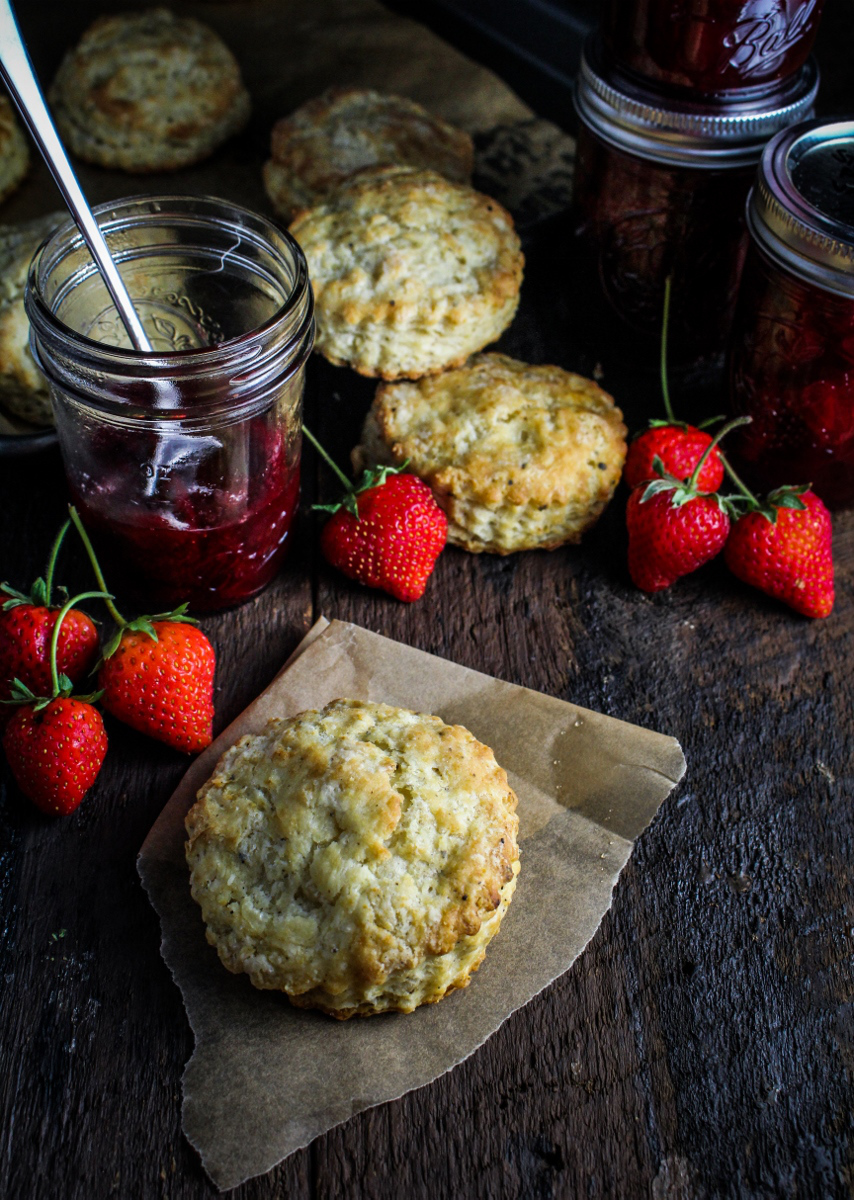
Of course, as delicious as jam is out of the jar, it’s still a condiment, and you typically need to serve it on something. Upon comparing a number of different biscuit recipes, I determined that the basic, accepted buttermilk biscuit recipe uses approximately the following ratio: 2 cups flour + 2 tsp baking powder + 1/2 tsp baking soda + 1 stick butter + 1 c. buttermilk, with a bit of variation from author to author. I followed this general guideline, used the frozen grated butter trick and added a few hefty teaspoons of freshly ground black pepper, and the resulting biscuits nearly stole the show from my poor jam. But really, they’re best together – cold and sweet strawberry jam filling in the nooks and crannies of hot and flaky buttery biscuits.
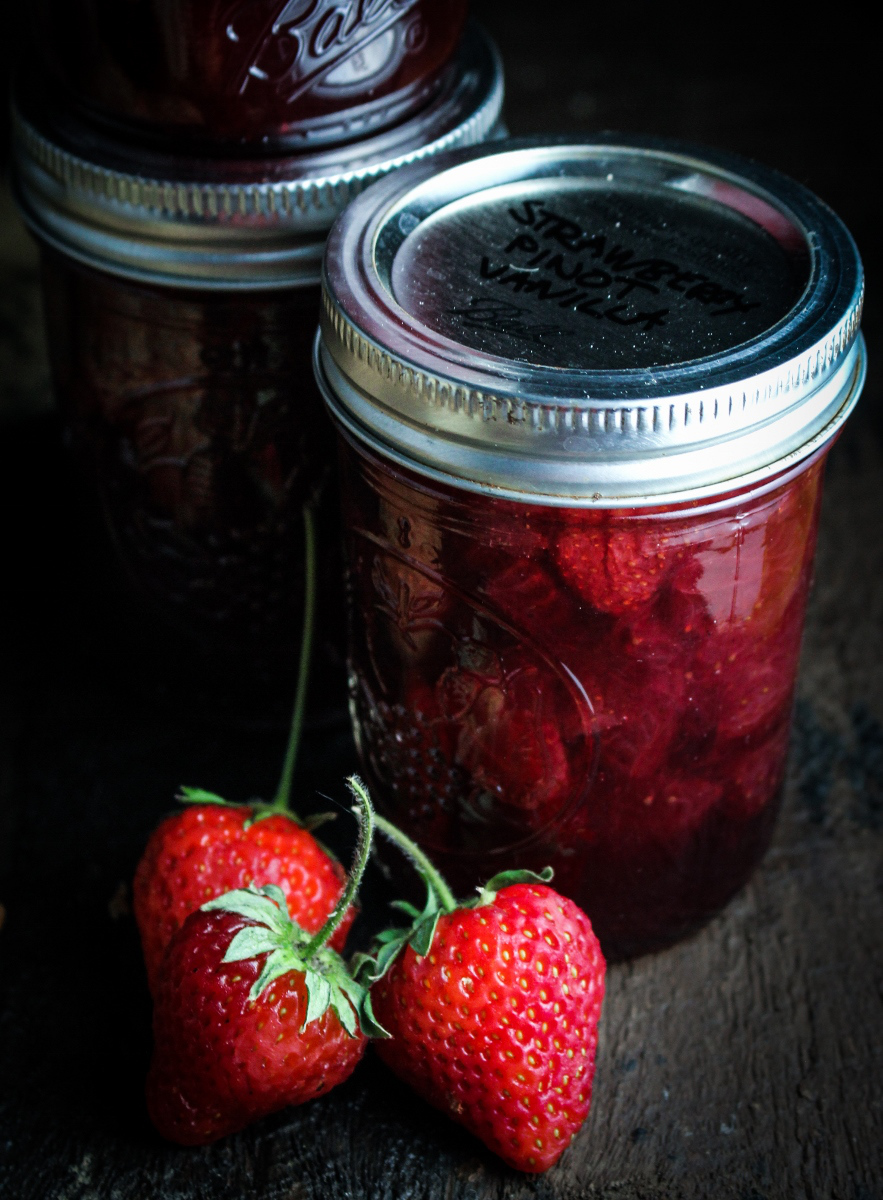
Strawberry, Pinot Noir, and Vanilla Jam
Makes 3 half-pint jars.
- 2 lbs fresh strawberries, hulled and quartered
- 1 1/4 c. plus 2 TBS sugar
- 1/2 (750ml) bottle of Pinot Noir
- juice from 1/2 lemon
- 1/2 vanilla bean
- In a wide, heavy-bottomed saucepan, combine the strawberries, sugar, wine and lemon juice. Split the vanilla bean down the middle, scraping the seeds into the berry mixture, then adding the bean pod. Bring the mixture to a boil, then reduce the heat slightly and simmer for 10 minutes, until the sugar is dissolved and the strawberries have released some of their juices. Cool to room temperature, cover, and refrigerate overnight or for up to 3 days to allow the berries to continue macerating.
- On the day you will can the jam, fill a large pot or canner with water and bring to a simmer. Scald 4 half-pint jars in the hot water to sterilize, leaving them there and a gentle simmer until you are ready to can. Soak your lids and rings in hot water to soften the seals, and sterilize your other equipment.
- Strain the juices from the berries into a large pot, reserving the fruit on the side. Place the juices over medium high heat and cook until they have reduced by half and have reached a temperature of 215°F, about 25 minutes. Add the fruit back to the juices and continue to cook, skimming any foam off the surface with a ladle, until the mixture has reached 212°F, another 15-20 minutes. If you don’t have a thermometer, test the consistency of a jam by dropping a few drops of liquid on a frozen plate – if the chilled liquid gels, then your jam is ready.
- Drain the hot water from your jars, and place the hot jars on the counter. Use a funnel to fill the hot jars with the hot jam, leaving a 1/2 inch space between the top of the jam and the rim of the jar. Wipe the rim with a clean paper towel, then place the lids on the jars, and screw the rings on until snug but not tight. Use canning tongs to transfer the jars back into the simmering water, increase the heat to a boil, then boil the jars for 10 minutes. Turn off the heat and leave the jars in the water for a few minutes, then remove the jars from the water and let cool completely. Listen for a pop as you remove the jars from the water – that indicates a seal has properly been formed. Note: Do not process any jars that are only partially full – it is only safe to process full jars. Any partially full jars should be stored in the fridge and eaten within a few weeks.
Black Pepper Buttermilk Biscuits
Makes 12-15 biscuits.
- 2 c. AP flour
- 2 tsp baking powder
- 1/2 tsp baking soda
- 1/2 tsp coarse sea salt
- 1 1/2 tsp freshly ground black pepper
- 1 stick salted butter, frozen
- 1 c. cold buttermilk
- Preheat the oven to 425°F. In a large bowl, whisk together flour, baking powder, baking soda, salt, and pepper. Grate frozen butter over the coarse holes of a box grater, then add the grated butter to the flour mixture. Use your fingers to gently toss the grated butter with the flour, fully coating the butter.
- Pour the buttermilk into the flour mixture, and use a fork to gently mix them together, just until the dough is moistened. Don’t overmix. Lightly flour a work surface and turn the dough out onto it. Knead the dough 2-3 times, just until it comes together, then flatten into a disk that is 1/2 an inch thick. Use a round cookie cutter (about 2-inches in diameter) to cut out biscuits, pressing the scraps together when you’ve run out of room to create a smaller disk. Place the biscuits on a baking sheet lined with parchment paper.
- Chill the biscuits in the fridge for 20 minutes, then transfer to the preheated oven. Bake until puffed and golden brown on the top and sides, about 15-18 minutes. Remove from the oven and serve immediately.
Dining and Cooking