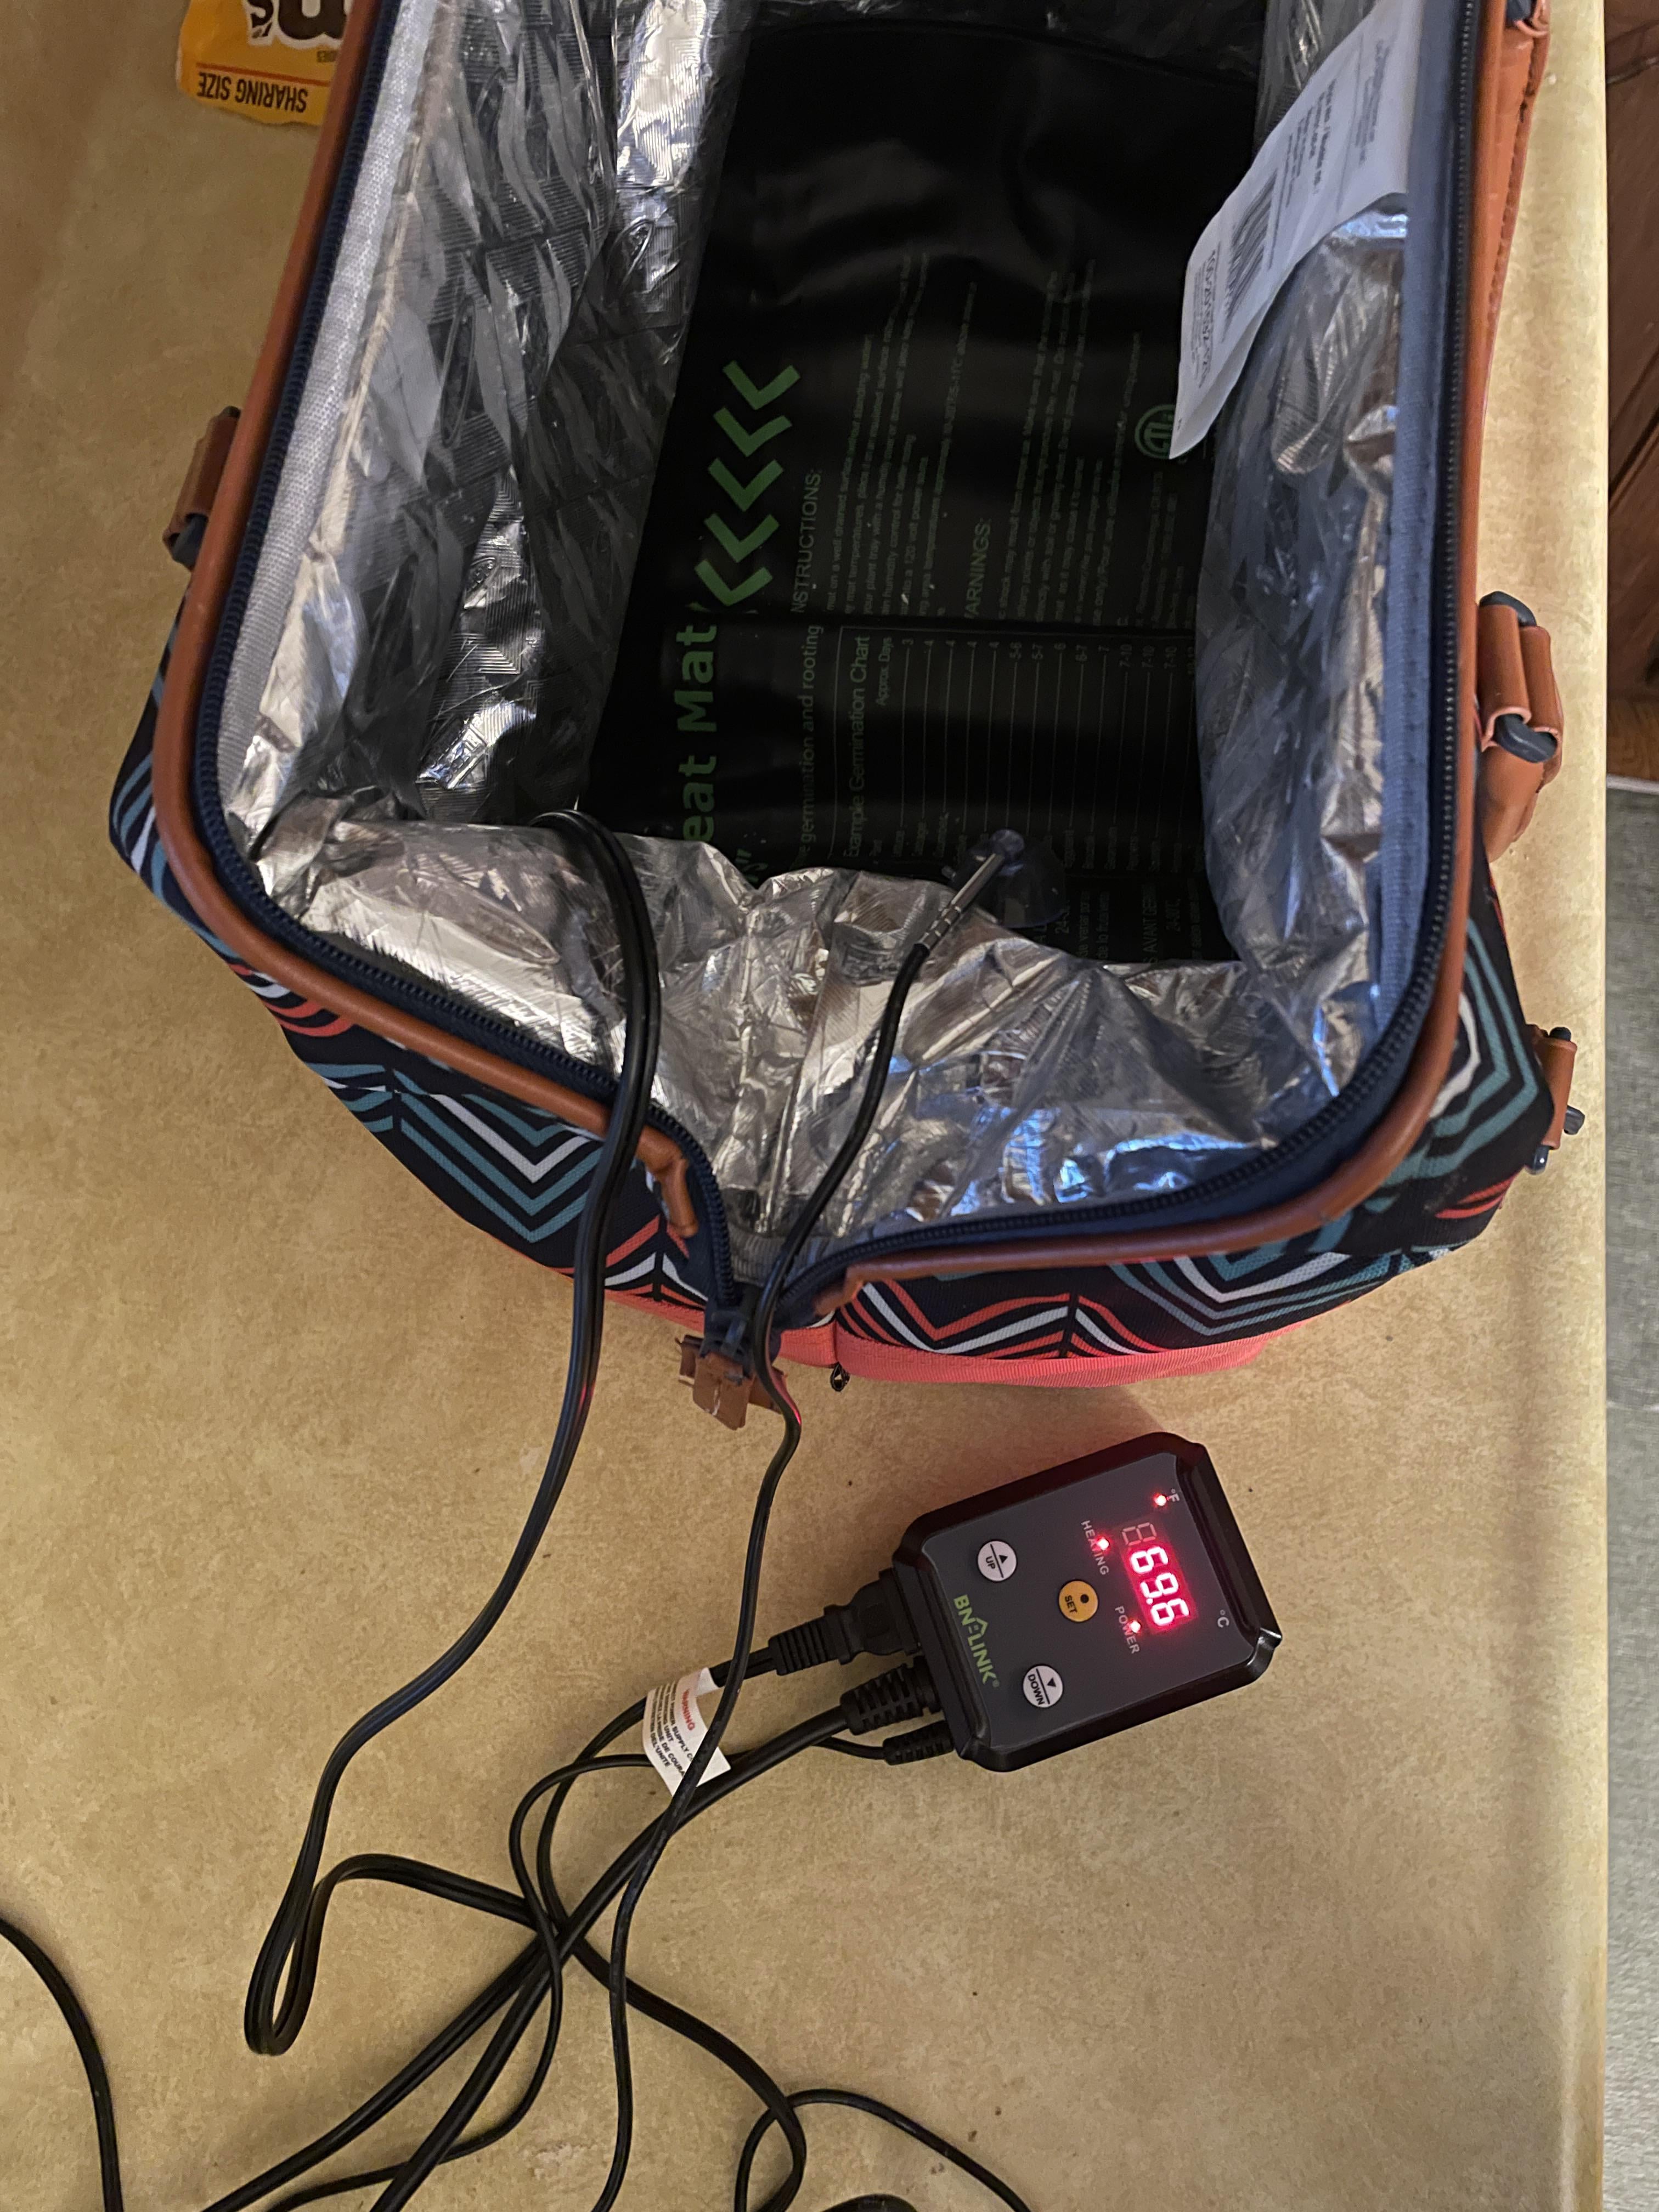
I had been struggling to get more character from my starter so I thought I’d spend a little more effort on temperature control.
I picked up a “seedling heating mat” from Uncle Bezos’s online emporium for around $15. I knew I didn’t want my mason jar or bowl of dough sitting straight on the mat, so I found a wire rack I already had at home. Threw the two inside an insulated bag and … boom. Cheap proofing box. I had this bag at home but if you’re near a Trader Joe’s, they have good ones for cheap.
It holds temperature pretty well. It will fluctuate a good 3 or 4 degrees above the target temp, but if your house runs cold I’d bargain to say that’s a better problem than cold temps.
It won’t say it’ll fix all your problems but it’s helped my starter and bulk proofing by getting me into better bacterial growth temps.
Recipe:
– 1 seeding mat
– 1 insulated bag
– 1 wire rack (optional but recommended)
– 120 volts of electricity (if in USA)
by importedpizza

9 Comments
Insulated bags are cheap and effective – also great for holding bbq meat for a couple of hours.
Lol. I did this exact thing a few months back. Yours looks better though. My seeding matt came with a rotery dial with high and low markings at each end of the rotation and no digital display.
Oven + pot with hot water + thermometer is all i need to keep a constantish temp.
Cool build. I made something similar about 10 years ago, but used a hard sided cooler, a temp controller from Amazon, and a light bulb for heat. The temp controller can be programmed to hold temperature to a fraction of a degree if desired.
This is also my step up since we live in the mountains and keep the house on the cool side (mid 60’s). It’s worked great the last year.
I use my prop chamber as a proofing box as well. Fabulous dual-use tech.
Nice 👌🏽
Can you also use an ice chest ?
This setup with a styrofoam cooler made my bread 25% better than proofing in an oven with the light on. Highly recommend it