350g Bob’s Redmill flour or King Arthur artisan bread flour or any ~13% protein with malted barley flour. Alternatively any ~13% protein bread flour + 0.3-0.5% of diastatic malt powder works too (a little less than 1g in this case). More protien is NOT always better, it will force a more closed crumb unless you ferment it way longer, to the point of too much acidity. 280g water, tap cold water. More on this later. 90g starter, 12h old (fed at 1:4:4 ratio, fed 2x before using if stored in the fridge) 6g salt
**Phase 0, 5 min active**
0. Mix flour + water, autolyse for 4 hours on the counter or 12 in the fridge (temp controls rate of starch breakdown). I typically do this when feeding my starter. This is so the hydrated malt flour gives the amylase a chance to increase the sugar content by slowly breaking down starches in the flour. Skipping this is okay but it will have a slightly less open crumb in the same timeframe. Alternatively just do more coil folds during bulk fermentation like with no knead recipes. The entire point of this step is to help force the process to fit in the 2-10 min windows of active time spread throughout the evening before and day of.
**Phase 1, 10 min active**
1. Add salt, starter and mix until incorporated and start a stopwatch in your phone’s clock app, I use this to track fermentation time for the whole bake. 2. Start doing slap and folds and/or tuck and folds until the dough tightens and starts to smooths out Slap and fold [https://www.youtube.com/shorts/fyfo9yw3Pqw](https://www.youtube.com/shorts/fyfo9yw3Pqw) Tuck and fold [https://youtu.be/HdoP33KPYtY?t=243](https://youtu.be/HdoP33KPYtY?t=243) I use them interchangeably, but mostly tuck and fold for smaller dough quantities like this. Be sure to keep the top on top, the goal is to build tension by preserving this outer layer for the entire bake. 3. Wait 5 min and repeat. Keep going until the dough is noticeably less sticky and stop whenever it looks like it’s threatening to tear at the top. Good time to score yesterdays loaf and bake it. I aim to have this phase around noon.
**Phase 2, 10 min active**
4. Now if you have a tight dough, let it sit and bulk ferment anywhere from 6-12 hours depending on temp of your proofing spot. I prefer low and slow, which is why I use cold water to start and my proofing spot is about 21c/70f. For the first hour of bulk fermentation, sometimes I’ll do an extra round of tuck and folds every 15-20m but if it’s already strong enough to pass a windowpane test and you didn’t tear the top layer too much in the prior phase AND you did an autolyse, it should be strong enough already to just let it ride.
5. After hour 5 or so I try to check it but typically I just entirely forget it exists until about the 8 hour mark since I know my setup is consistent enough in my kitchen. Regardless of how long, if it’s increased by ~90% while fermenting at 21c/70f, using you’re ready to shape. Choose whatever shape you prefer but I typically do a batard and shaped like this: [https://www.youtube.com/watch?v=L95xJ_3E3Xc](https://www.youtube.com/watch?v=L95xJ_3E3Xc) Pay extra close attention to the rolling at the end, tension and fermentation is everything but not so much tension you degass the dough.

2 Comments
Recipe! Shout out to[ Culinary Exploration](https://www.youtube.com/c/CulinaryExploration) on youtube for being an amazing reference for this.
350g Bob’s Redmill flour or King Arthur artisan bread flour or any ~13% protein with malted barley flour. Alternatively any ~13% protein bread flour + 0.3-0.5% of diastatic malt powder works too (a little less than 1g in this case). More protien is NOT always better, it will force a more closed crumb unless you ferment it way longer, to the point of too much acidity.
280g water, tap cold water. More on this later.
90g starter, 12h old (fed at 1:4:4 ratio, fed 2x before using if stored in the fridge)
6g salt
**Phase 0, 5 min active**
0. Mix flour + water, autolyse for 4 hours on the counter or 12 in the fridge (temp controls rate of starch breakdown). I typically do this when feeding my starter. This is so the hydrated malt flour gives the amylase a chance to increase the sugar content by slowly breaking down starches in the flour. Skipping this is okay but it will have a slightly less open crumb in the same timeframe. Alternatively just do more coil folds during bulk fermentation like with no knead recipes. The entire point of this step is to help force the process to fit in the 2-10 min windows of active time spread throughout the evening before and day of.
**Phase 1, 10 min active**
1. Add salt, starter and mix until incorporated and start a stopwatch in your phone’s clock app, I use this to track fermentation time for the whole bake.
2. Start doing slap and folds and/or tuck and folds until the dough tightens and starts to smooths out Slap and fold [https://www.youtube.com/shorts/fyfo9yw3Pqw](https://www.youtube.com/shorts/fyfo9yw3Pqw) Tuck and fold [https://youtu.be/HdoP33KPYtY?t=243](https://youtu.be/HdoP33KPYtY?t=243) I use them interchangeably, but mostly tuck and fold for smaller dough quantities like this. Be sure to keep the top on top, the goal is to build tension by preserving this outer layer for the entire bake.
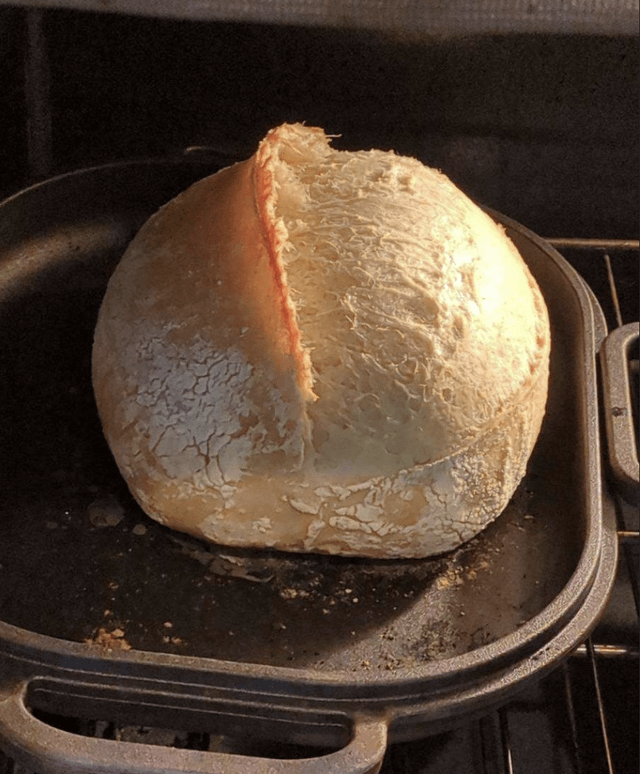
3. Wait 5 min and repeat. Keep going until the dough is noticeably less sticky and stop whenever it looks like it’s threatening to tear at the top. Good time to score yesterdays loaf and bake it. I aim to have this phase around noon.
**Phase 2, 10 min active**
4. Now if you have a tight dough, let it sit and bulk ferment anywhere from 6-12 hours depending on temp of your proofing spot. I prefer low and slow, which is why I use cold water to start and my proofing spot is about 21c/70f.
For the first hour of bulk fermentation, sometimes I’ll do an extra round of tuck and folds every 15-20m but if it’s already strong enough to pass a windowpane test and you didn’t tear the top layer too much in the prior phase AND you did an autolyse, it should be strong enough already to just let it ride.
5. After hour 5 or so I try to check it but typically I just entirely forget it exists until about the 8 hour mark since I know my setup is consistent enough in my kitchen. Regardless of how long, if it’s increased by ~90% while fermenting at 21c/70f, using you’re ready to shape. Choose whatever shape you prefer but I typically do a batard and shaped like this: [https://www.youtube.com/watch?v=L95xJ_3E3Xc](https://www.youtube.com/watch?v=L95xJ_3E3Xc) Pay extra close attention to the rolling at the end, tension and fermentation is everything but not so much tension you degass the dough.
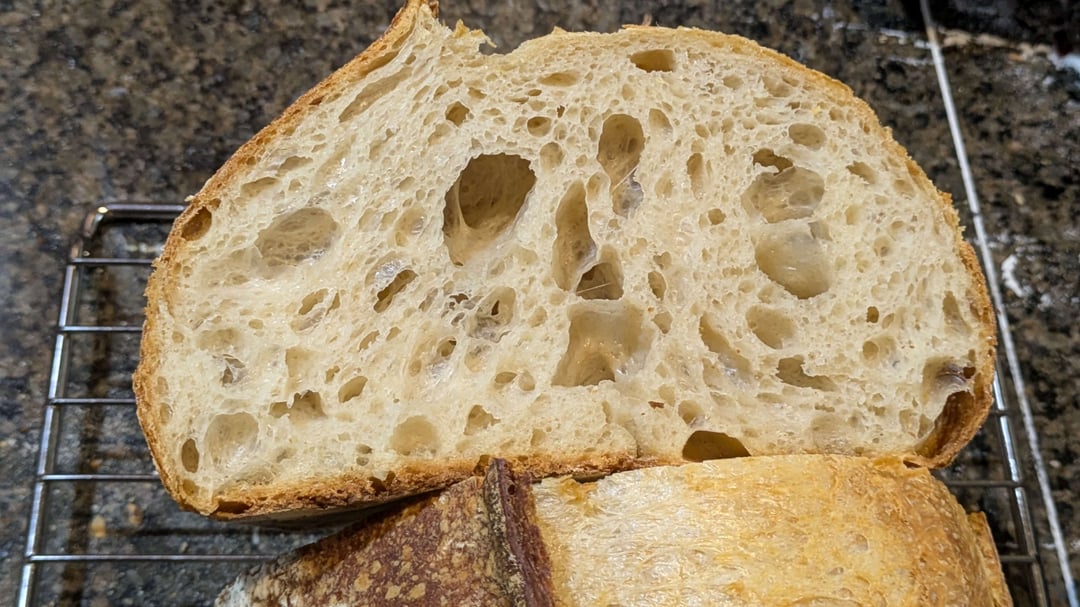
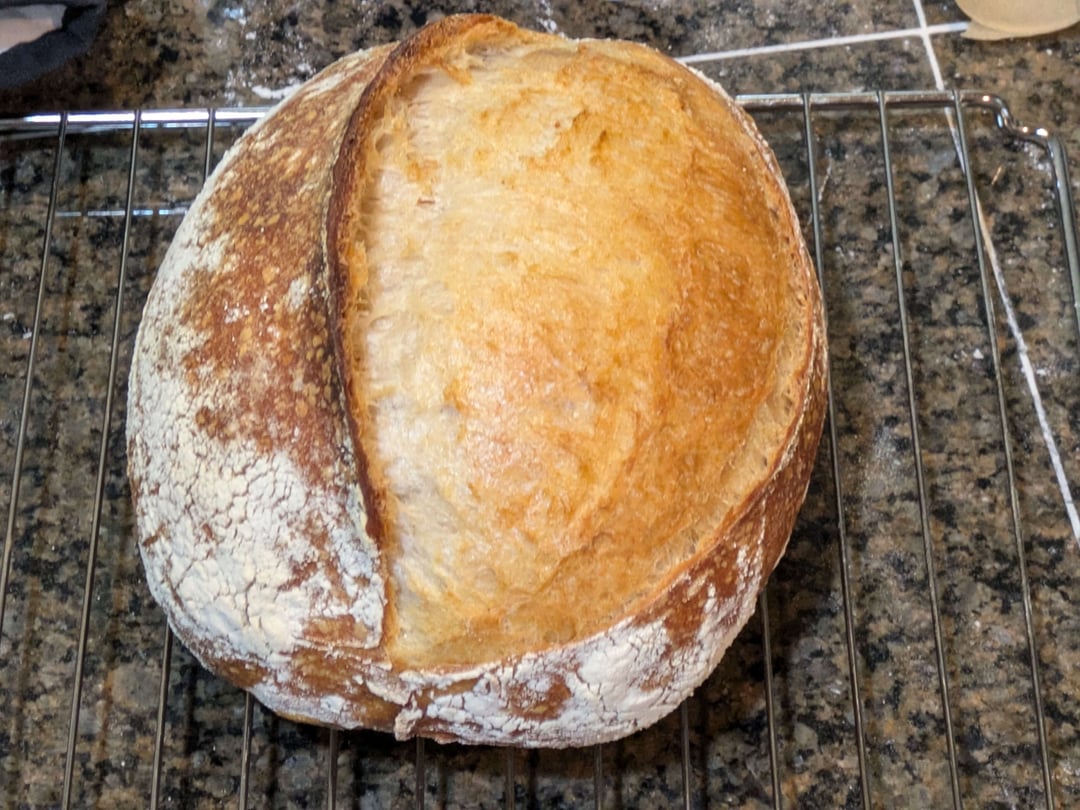
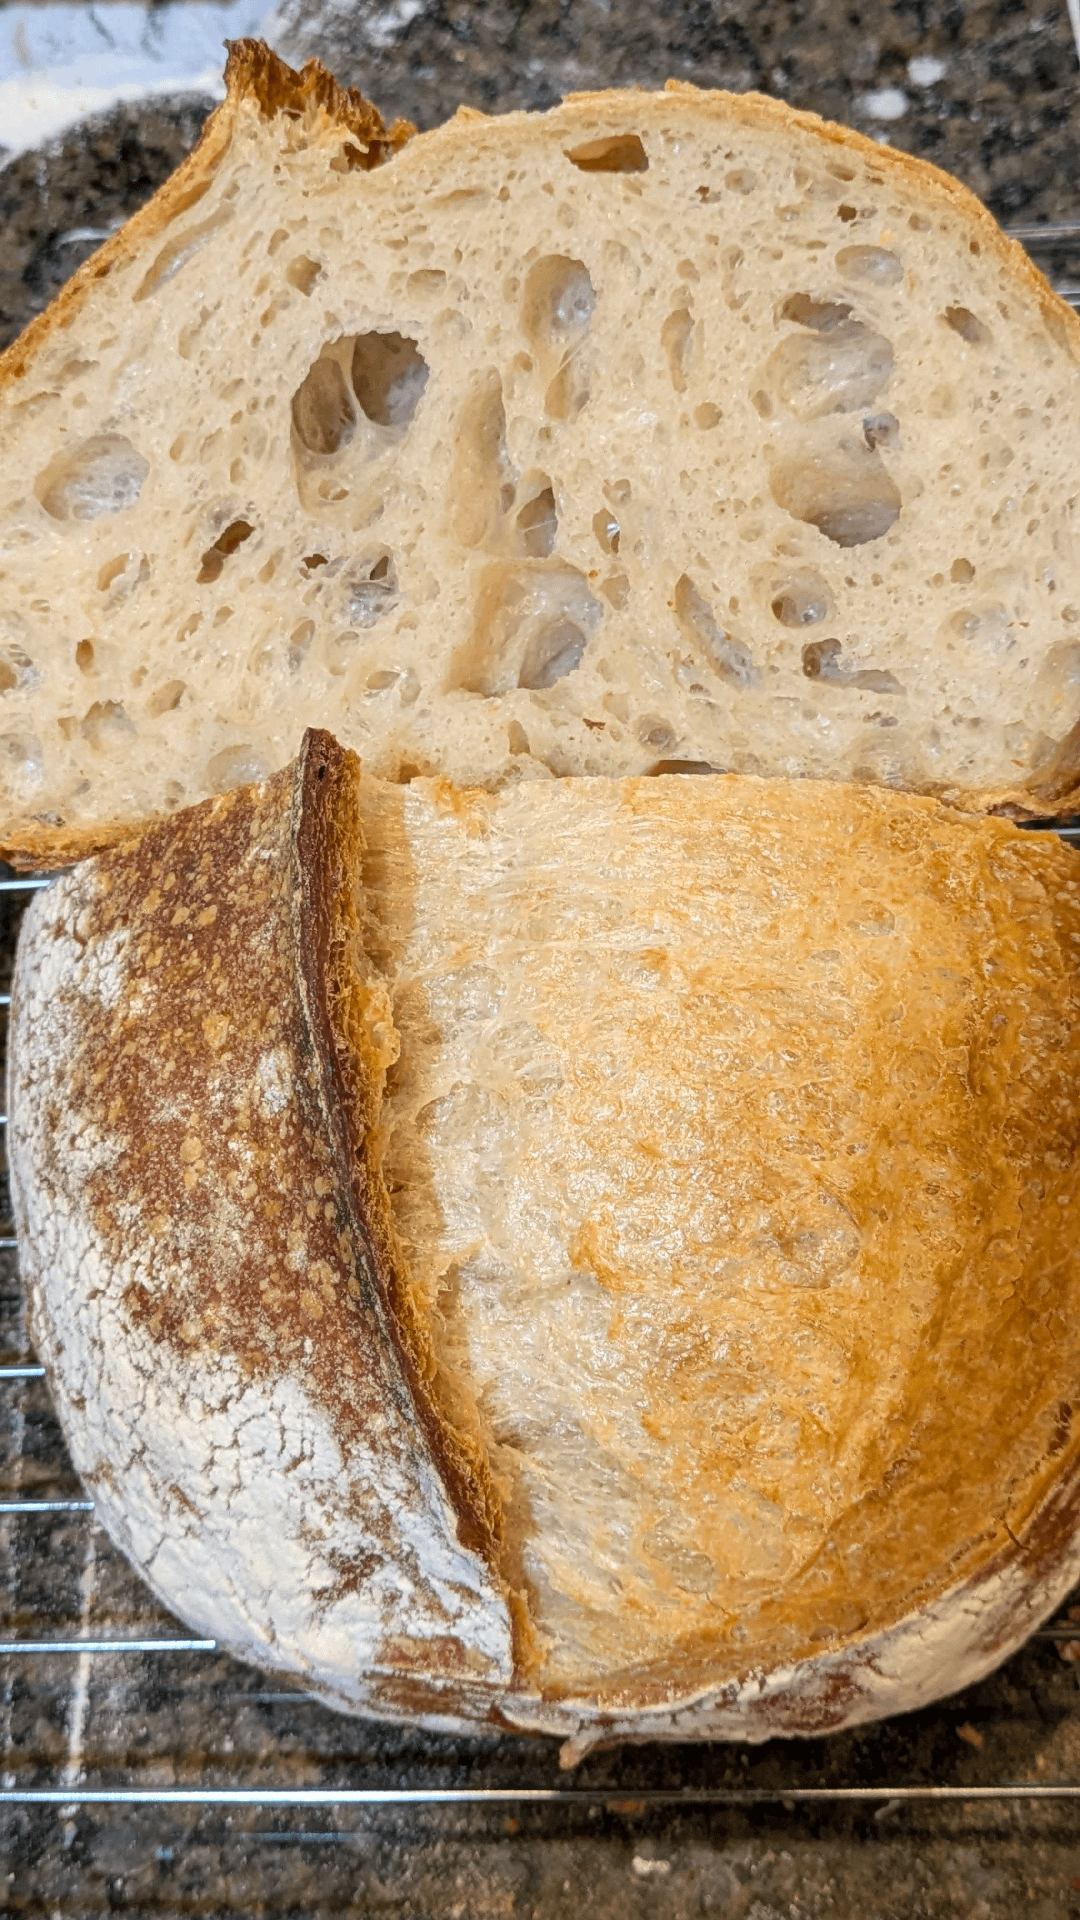
Beautiful!