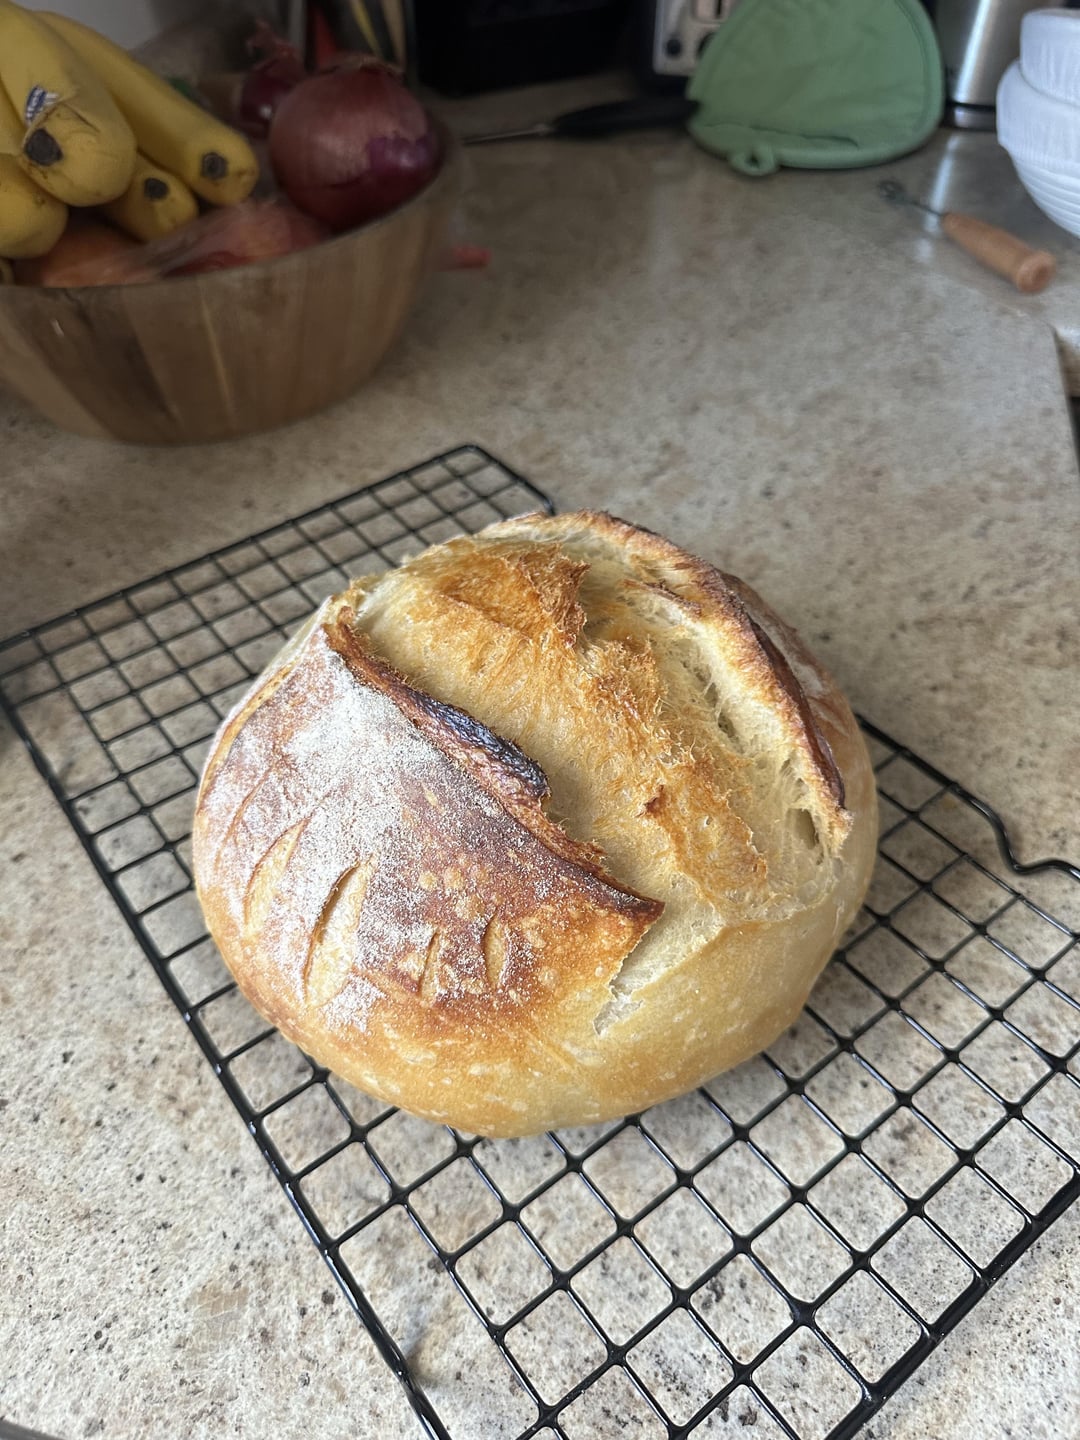
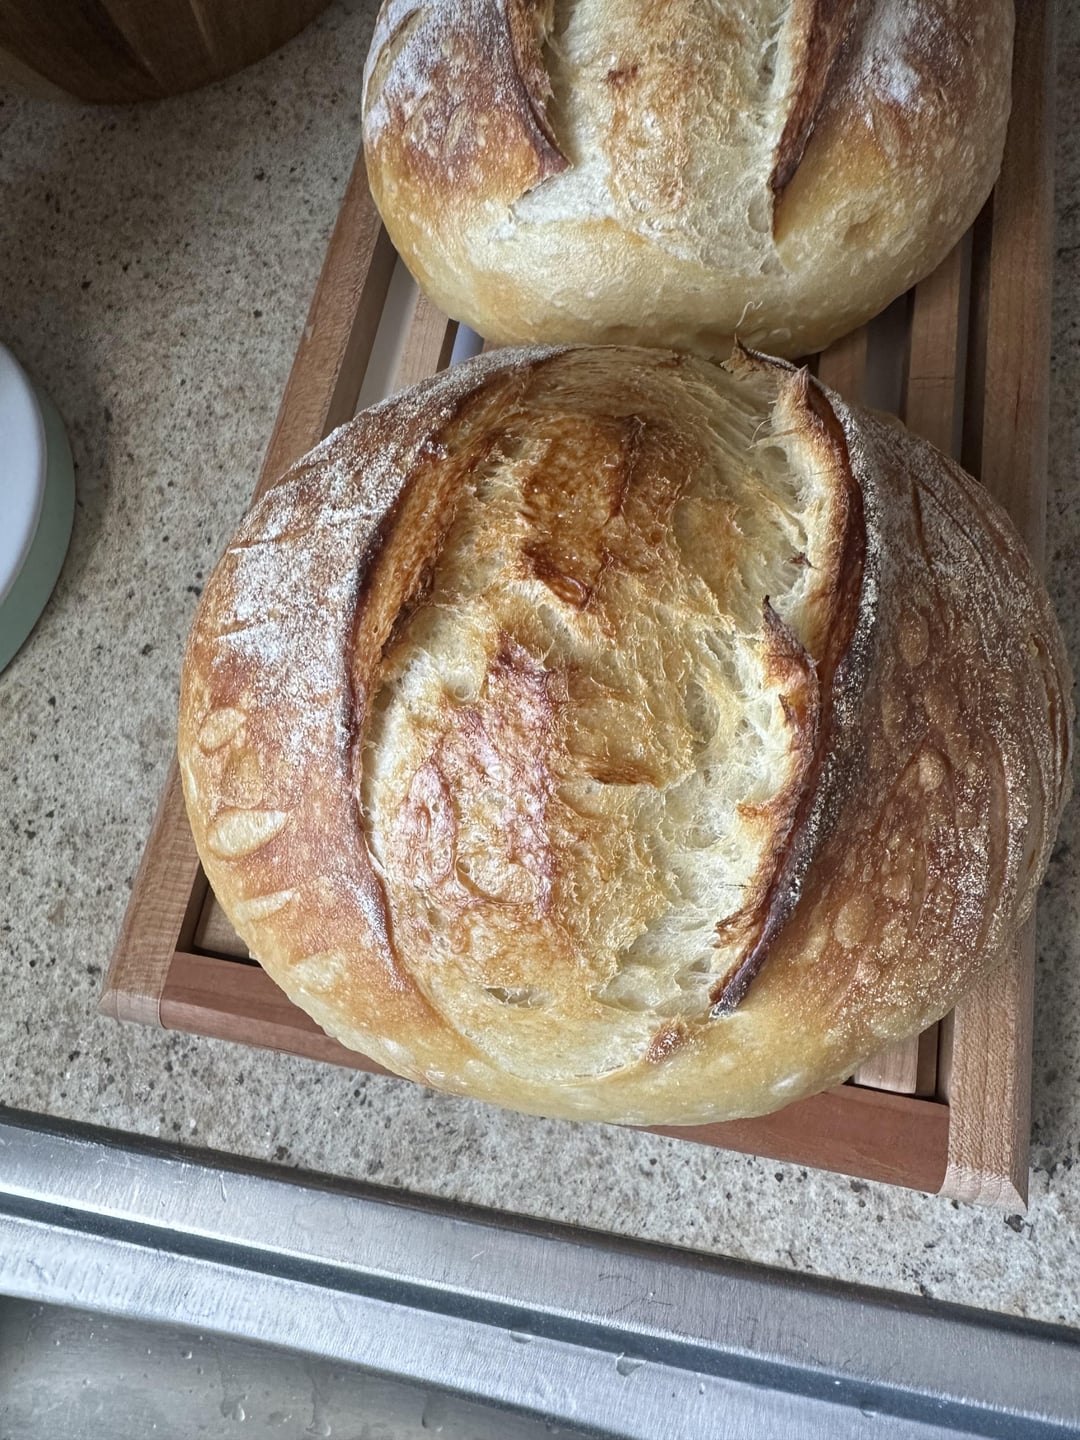
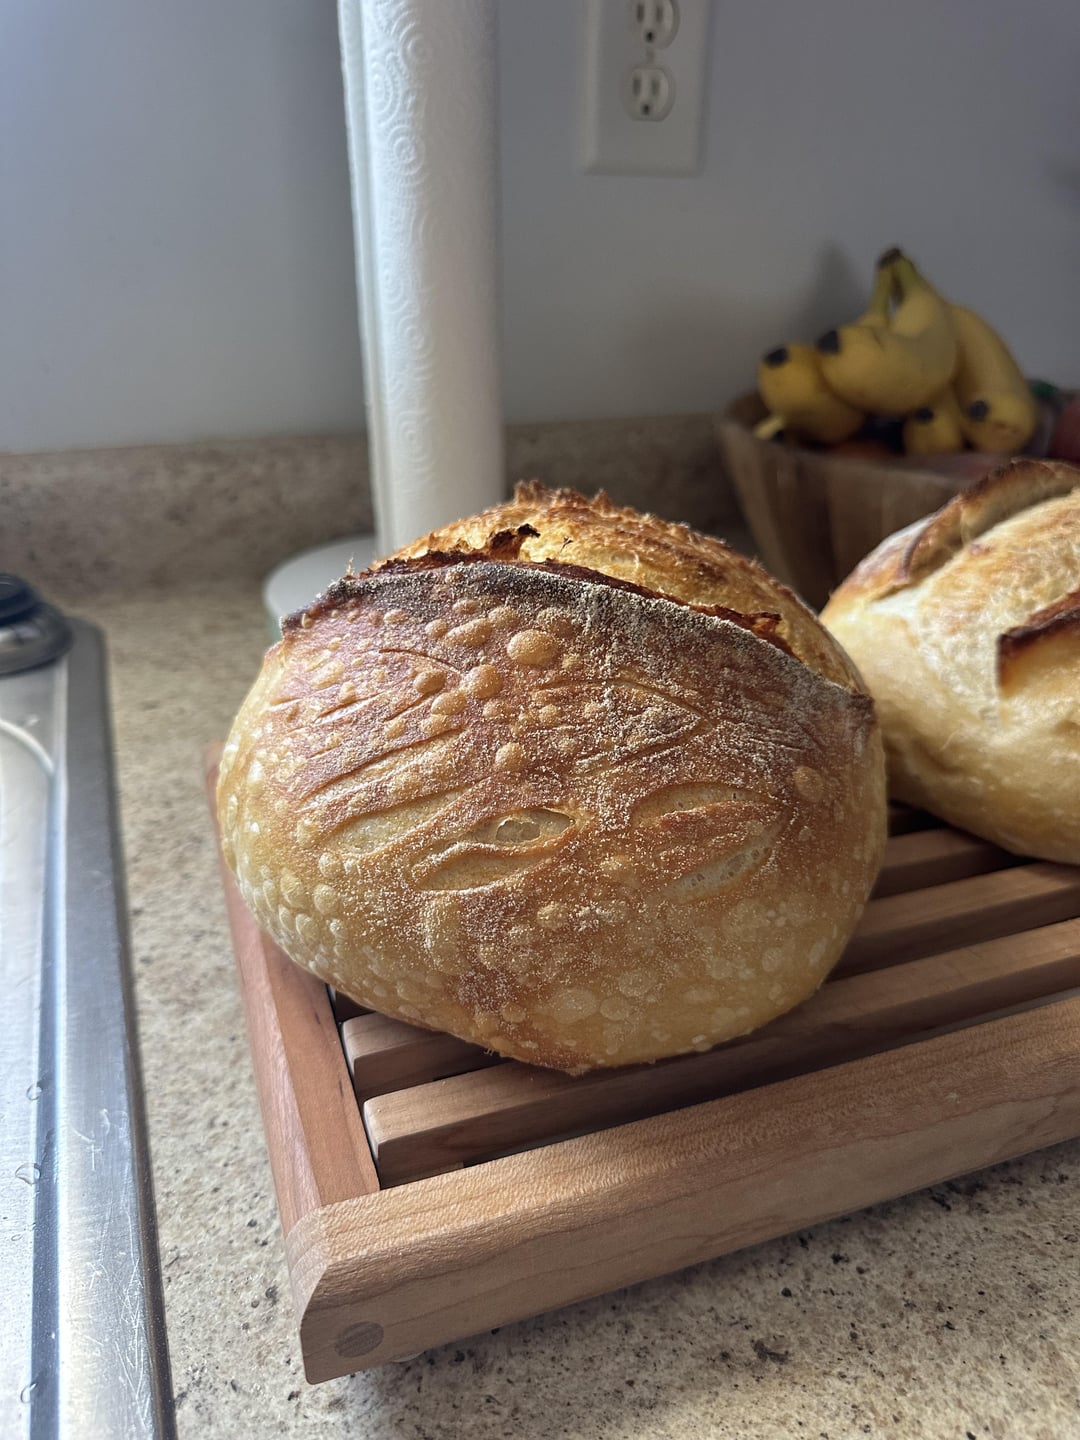
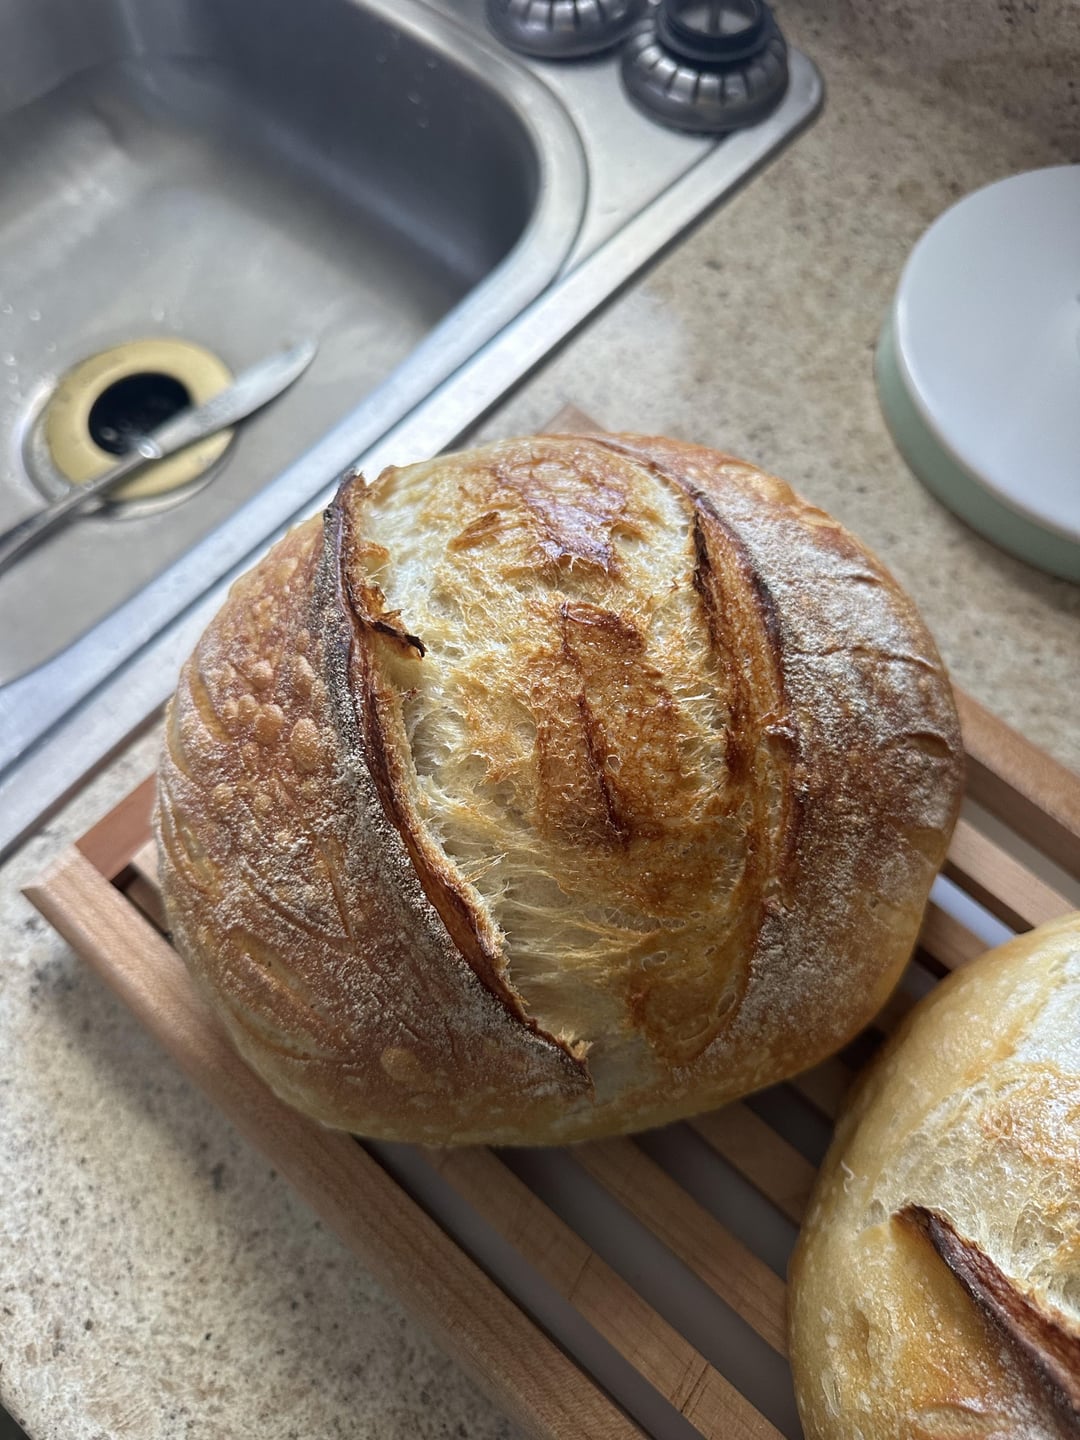
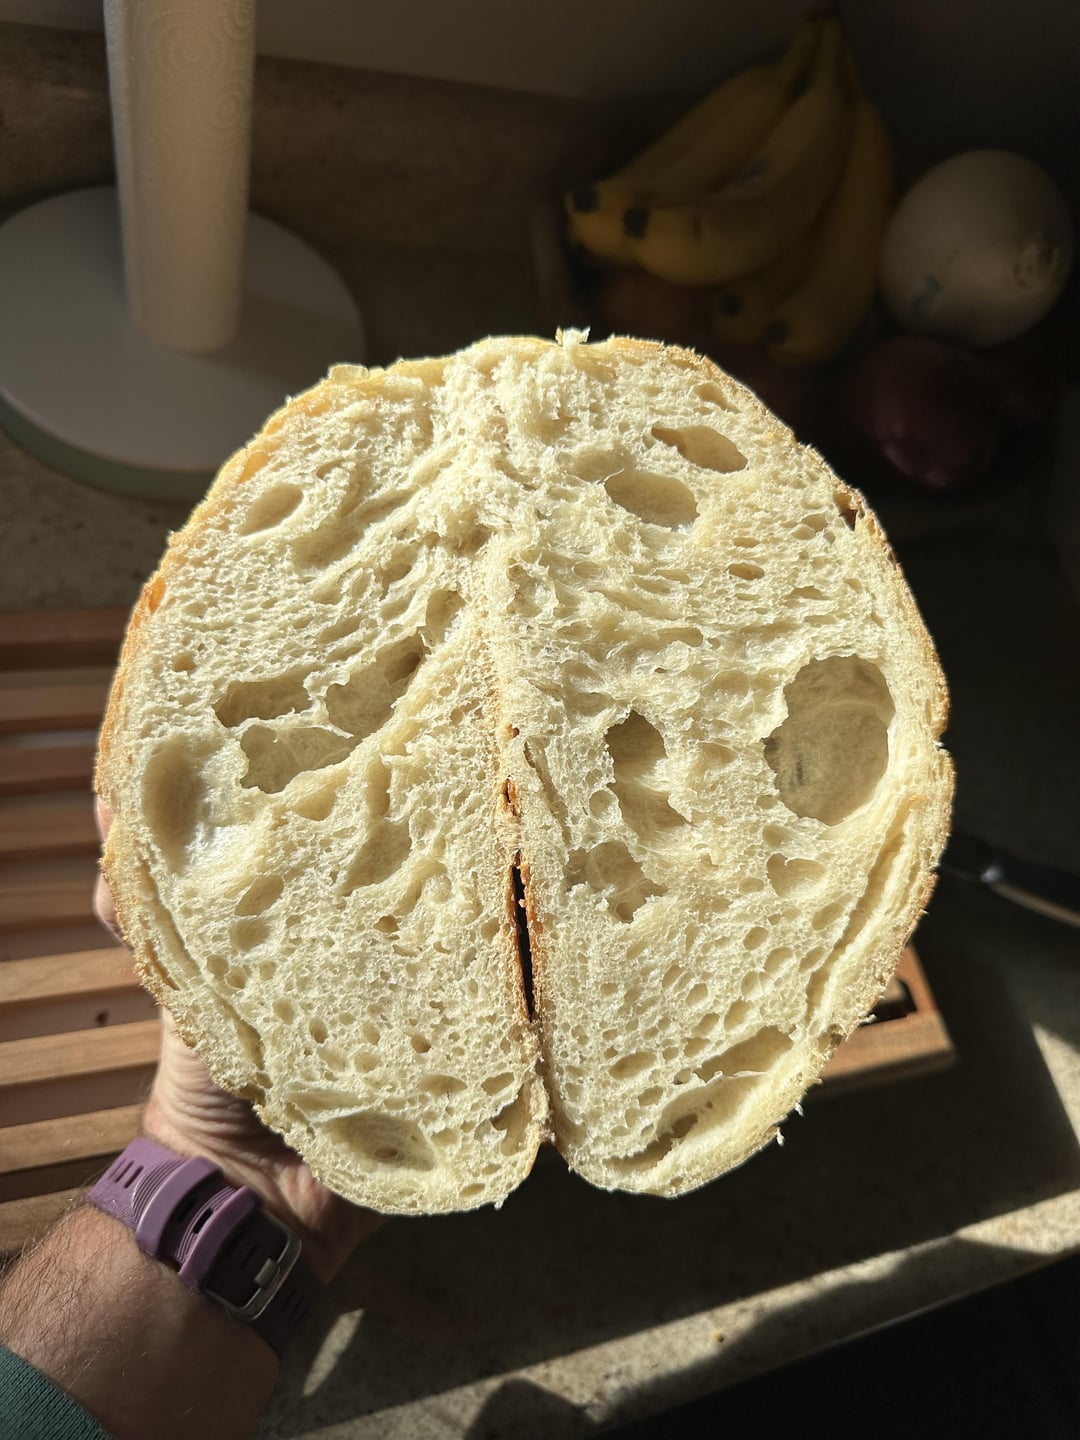
I’m in college and got a bit busy last semester, so I didn’t bake that much Sourdough. This is my first attempt of the new year and I’m really proud of how it turned out. Any suggestions for better crust/scoring?
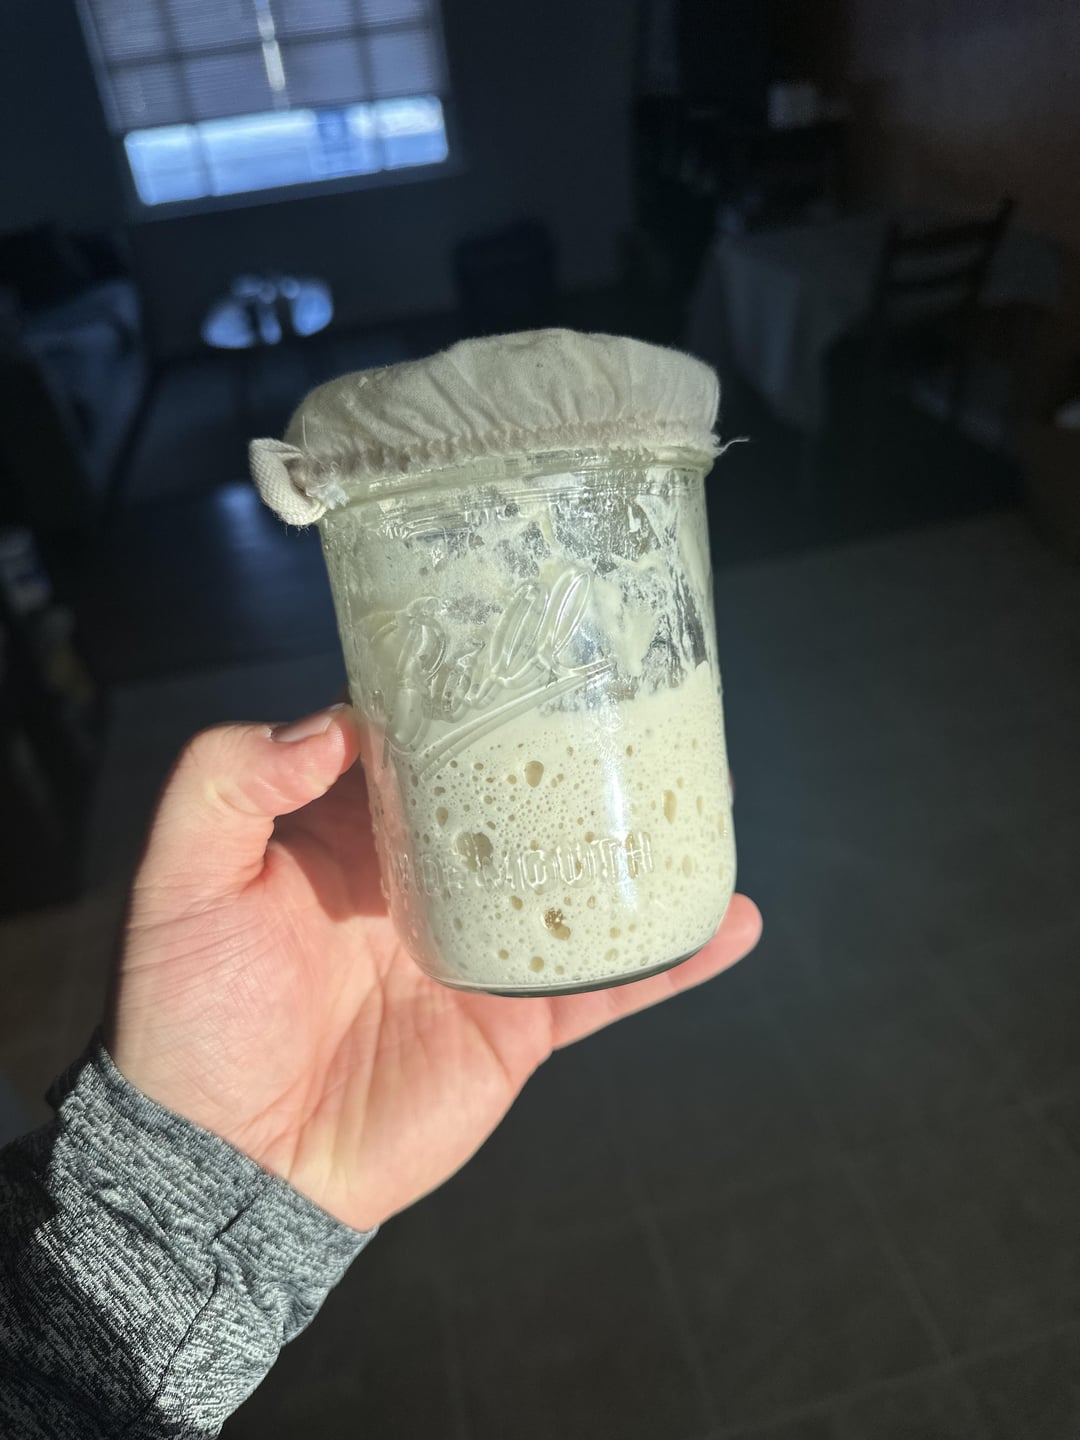
Starter: – 50g of starter, 50g or water, 50g of flour. Mix well. – Cover with a cloth and rubber band (not sealed). – Feed every 12 hours for 4-5 days, or until your starter is bubbly and active.
Making the Dough: – Whisk the starter (50g) and the water (350g warm water) with a fork until well combined. – Add the flour (500g) and sea salt (9g) and combine until a stiff dough forms. – Finish mixing by hand to fully incorporate the flour. The dough should fell dense and shaggy. It will stick to your fingers as you go, so I recommend going a flexible bench scrapper to make sure you are getting everything off the sides. – Cover with a damp towel and let rest for 30 minutes. – After the dough has rested, work the mass into a fairly smooth ball. I do this by grabbing a portion of the dough and folding it over, pressing my fingertips into the center. Repeat this, working your way around the dough, until it is tightened — should be about 15-20 seconds.
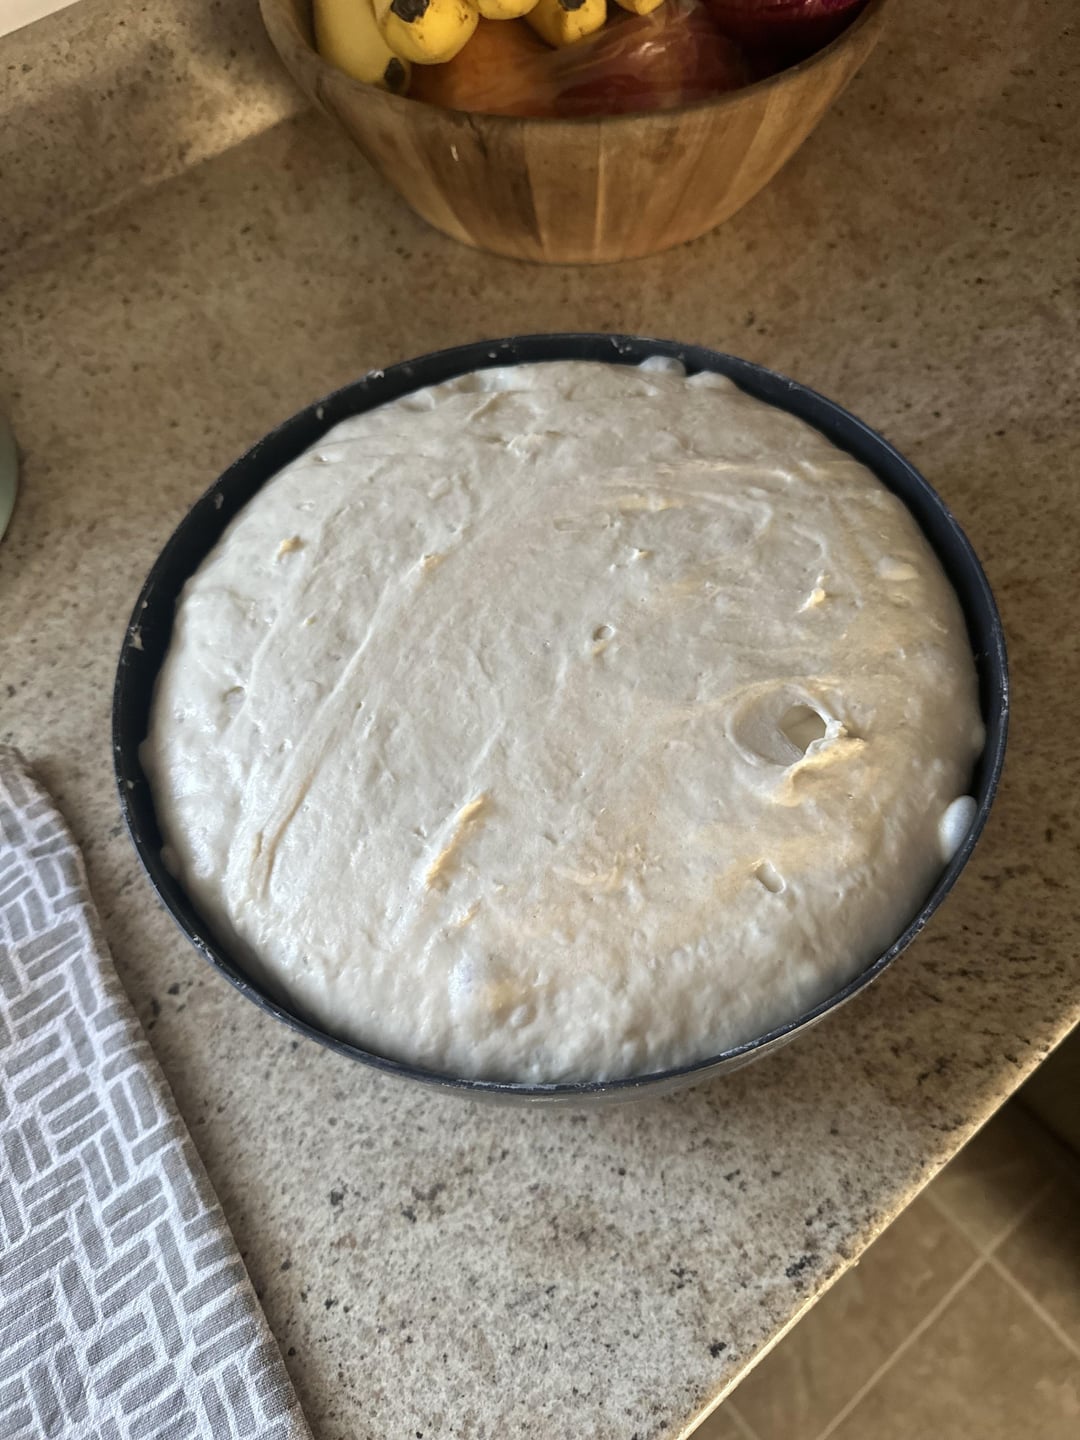
Bulk Fermentation: – Cover the bowl with a damp towel and let rise at room temperature. I do overnight, 8-10 hours. Just make the dough right before bed and continue the next morning. The do is ready when it no longer looks dense and has about doubled in size.
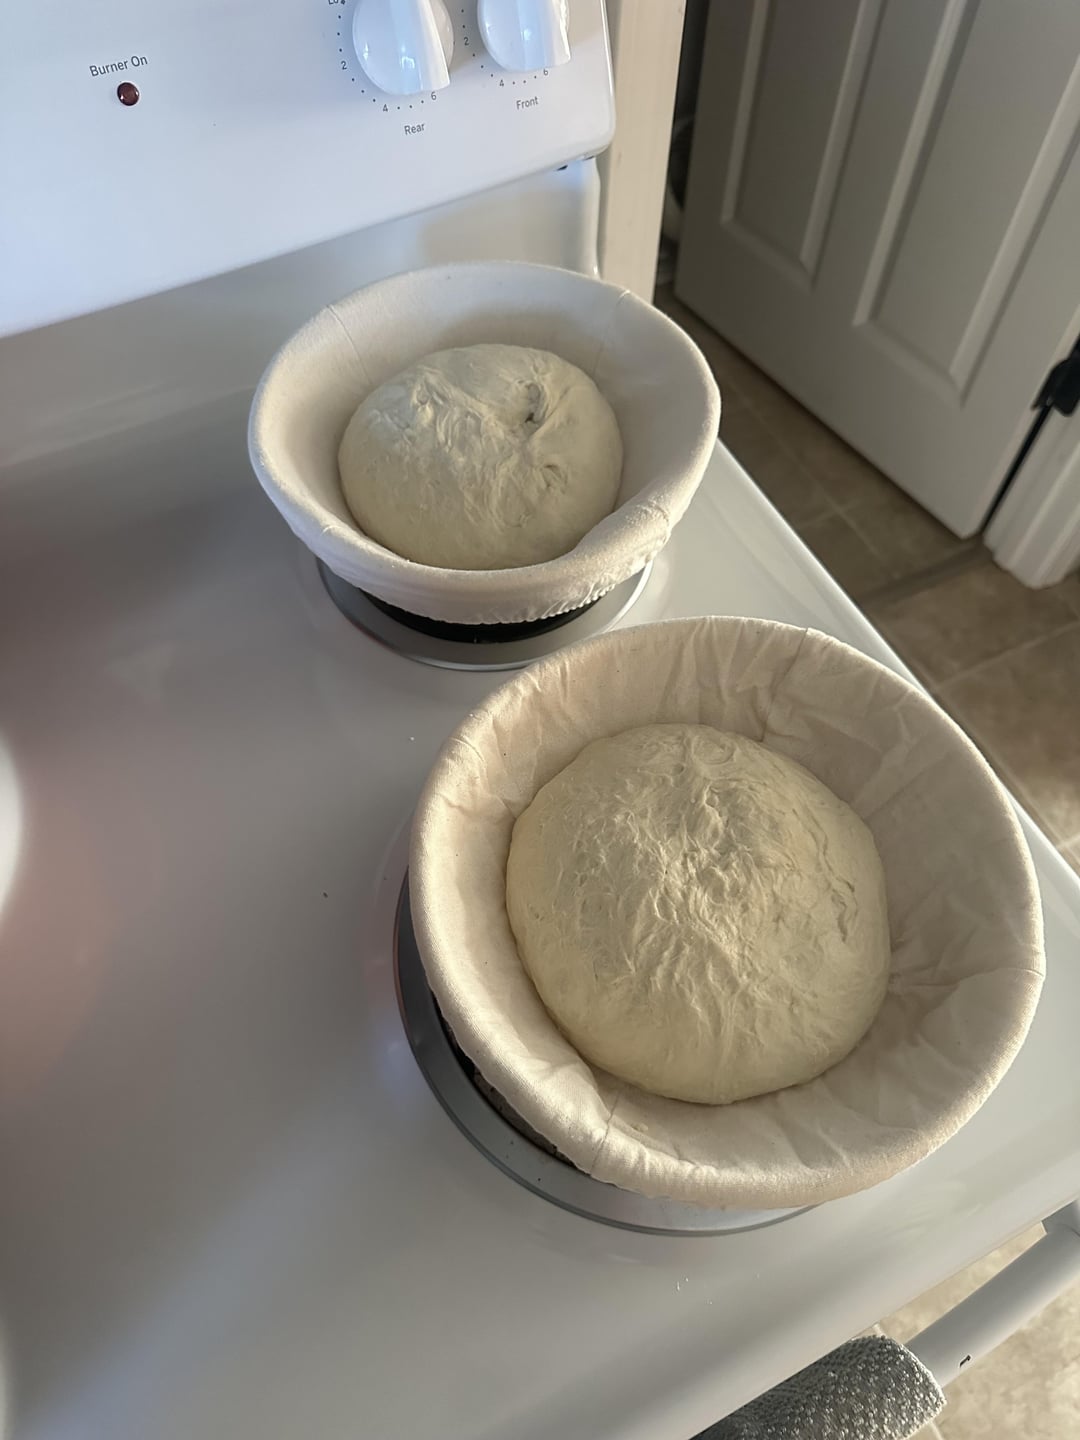
Shaping the Dough: – In the morning, coax the dough onto a lightly floured work surface. To shape it into a round, start at the top and fold the dough over toward the center. Turn the dough slightly and fold over the next section of dough. Repeat until you have come full circle. Flip the dough over and let it rest for 5-10 minutes. – While your dough is resting, line and 8-inch bowl with a bowl and dust with flour (I use a banaton or proofing basket). – After the dough has rested, with floured hands, pull the dough towards you and under itself in a circular motion to tighten its shape. – Then, using a bench scraper, place the dough into your proofing bowl/basket with the seam side up.
Second Rise: – Cover the proofing bowl/basket and let rest for 30 minutes to an hour OR put it in the refrigerator for 6-24 hours. The dough is ready when it looks puffy and has risen slightly but not doubled in size. Do a finger poke test! – Preheat your oven to 450 degrees Fahrenheit. – While the oven is preheating, cut a sheet of parchment paper to the side of your baking pot (I use a dutch oven) — make sure to leave enough excess around the sides so you can use them like handles to pull the bread out.
Scoring: – Place the parchment paper over the proofing bowl/basket and invert the bowl to release. – Sprinkle the dough with some rice flour and gently rub it across the dough. – Using the tip of a small, serrated knife 0r a razor, score the dough with whatever pattern you’d prefer. Make sure there is at least one deeper cut.
Bake: – If you are using the refrigerator method, put your dough in when the oven is preheated to 350 degrees Fahrenheit. Wait until the oven is fully preheated otherwise. – Bake the dough with the lid on for 35 minutes, then remove the lid and finish baking for 15-20 minutes. – Allow your bread to cool for at least an hour before slicing.


4 Comments
Looks amazing! Great job!
Ingredients!
https://preview.redd.it/2pdvustpkkee1.jpeg?width=1290&format=pjpg&auto=webp&s=228c541e5a3a2d549d4cb445f3f8c5135c4e4161
PROCESS
Starter:
– 50g of starter, 50g or water, 50g of flour. Mix well.
– Cover with a cloth and rubber band (not sealed).
– Feed every 12 hours for 4-5 days, or until your starter is bubbly and active.
Making the Dough:
– Whisk the starter (50g) and the water (350g warm water) with a fork until well combined.
– Add the flour (500g) and sea salt (9g) and combine until a stiff dough forms.
– Finish mixing by hand to fully incorporate the flour. The dough should fell dense and shaggy. It will stick to your fingers as you go, so I recommend going a flexible bench scrapper to make sure you are getting everything off the sides.
– Cover with a damp towel and let rest for 30 minutes.
– After the dough has rested, work the mass into a fairly smooth ball. I do this by grabbing a portion of the dough and folding it over, pressing my fingertips into the center. Repeat this, working your way around the dough, until it is tightened — should be about 15-20 seconds.
Bulk Fermentation:
– Cover the bowl with a damp towel and let rise at room temperature. I do overnight, 8-10 hours. Just make the dough right before bed and continue the next morning. The do is ready when it no longer looks dense and has about doubled in size.
Shaping the Dough:
– In the morning, coax the dough onto a lightly floured work surface. To shape it into a round, start at the top and fold the dough over toward the center. Turn the dough slightly and fold over the next section of dough. Repeat until you have come full circle. Flip the dough over and let it rest for 5-10 minutes.
– While your dough is resting, line and 8-inch bowl with a bowl and dust with flour (I use a banaton or proofing basket).
– After the dough has rested, with floured hands, pull the dough towards you and under itself in a circular motion to tighten its shape.
– Then, using a bench scraper, place the dough into your proofing bowl/basket with the seam side up.
Second Rise:
– Cover the proofing bowl/basket and let rest for 30 minutes to an hour OR put it in the refrigerator for 6-24 hours. The dough is ready when it looks puffy and has risen slightly but not doubled in size. Do a finger poke test!
– Preheat your oven to 450 degrees Fahrenheit.
– While the oven is preheating, cut a sheet of parchment paper to the side of your baking pot (I use a dutch oven) — make sure to leave enough excess around the sides so you can use them like handles to pull the bread out.
Scoring:
– Place the parchment paper over the proofing bowl/basket and invert the bowl to release.
– Sprinkle the dough with some rice flour and gently rub it across the dough.
– Using the tip of a small, serrated knife 0r a razor, score the dough with whatever pattern you’d prefer. Make sure there is at least one deeper cut.
Bake:
– If you are using the refrigerator method, put your dough in when the oven is preheated to 350 degrees Fahrenheit. Wait until the oven is fully preheated otherwise.
– Bake the dough with the lid on for 35 minutes, then remove the lid and finish baking for 15-20 minutes.
– Allow your bread to cool for at least an hour before slicing.
Nice job! Thank u for the detailed recipe