
I had my first canelé a few years ago, and it was perfect. I have been obsessed with them ever since but have yet to buy another that matched the perfect caramelized exterior and soft, custardy interior. (I buy them wherever I see them being sold, and usually the shell is pretty soft…). I finally splurged on some copper molds to try my hand. I bought 6, 45 mm molds—slightly smaller than the standard size—to save some money.
I used the recipe from “Taste of Artisan,” which produced enough for about 4 batches. I’m a toaster oven enthusiast so I experimented with timing and temperature for each batch. Overall, they were on the spectrum of pretty good to pretty darn good. There’s still room to experiment a bit, but I would feel comfortable sharing them with guests at this point. Also…I didn’t have any cul blanc!
That having been said, I couldn’t find any resources on toaster oven canelés, so I’m sharing my notes below!
—I seasoned my molds before hand with a coating of butter, baking them at about 350 for around an hour.
—Resting the batter: I made 2 canelés straight away without letting the batter rest (couldn’t resist), then baked the 2nd batch after letting the batter rest for about 18 hours, then 24, and then 48. Honestly, I can’t say that I noticed a huge difference after the 18 hour mark.
—Coating the molds with a beeswax butter combo: I heated the mixture in a mason jar placed inside a pot with boiling water…makeshift Bain Marie. At the same time, I pre-warmed the molds in the toaster oven so I was pouring hot into hot (using tongs was easiest for me to maneuver the pouring). The coating was very thin but very effective—every canelé came right out. After pouring the wax mixture from one mold to the next, I turned the molds upside down so the extra wax didn’t drip down. I did refrigerate them afterwards to get them nice and cool before pouring the batter in.
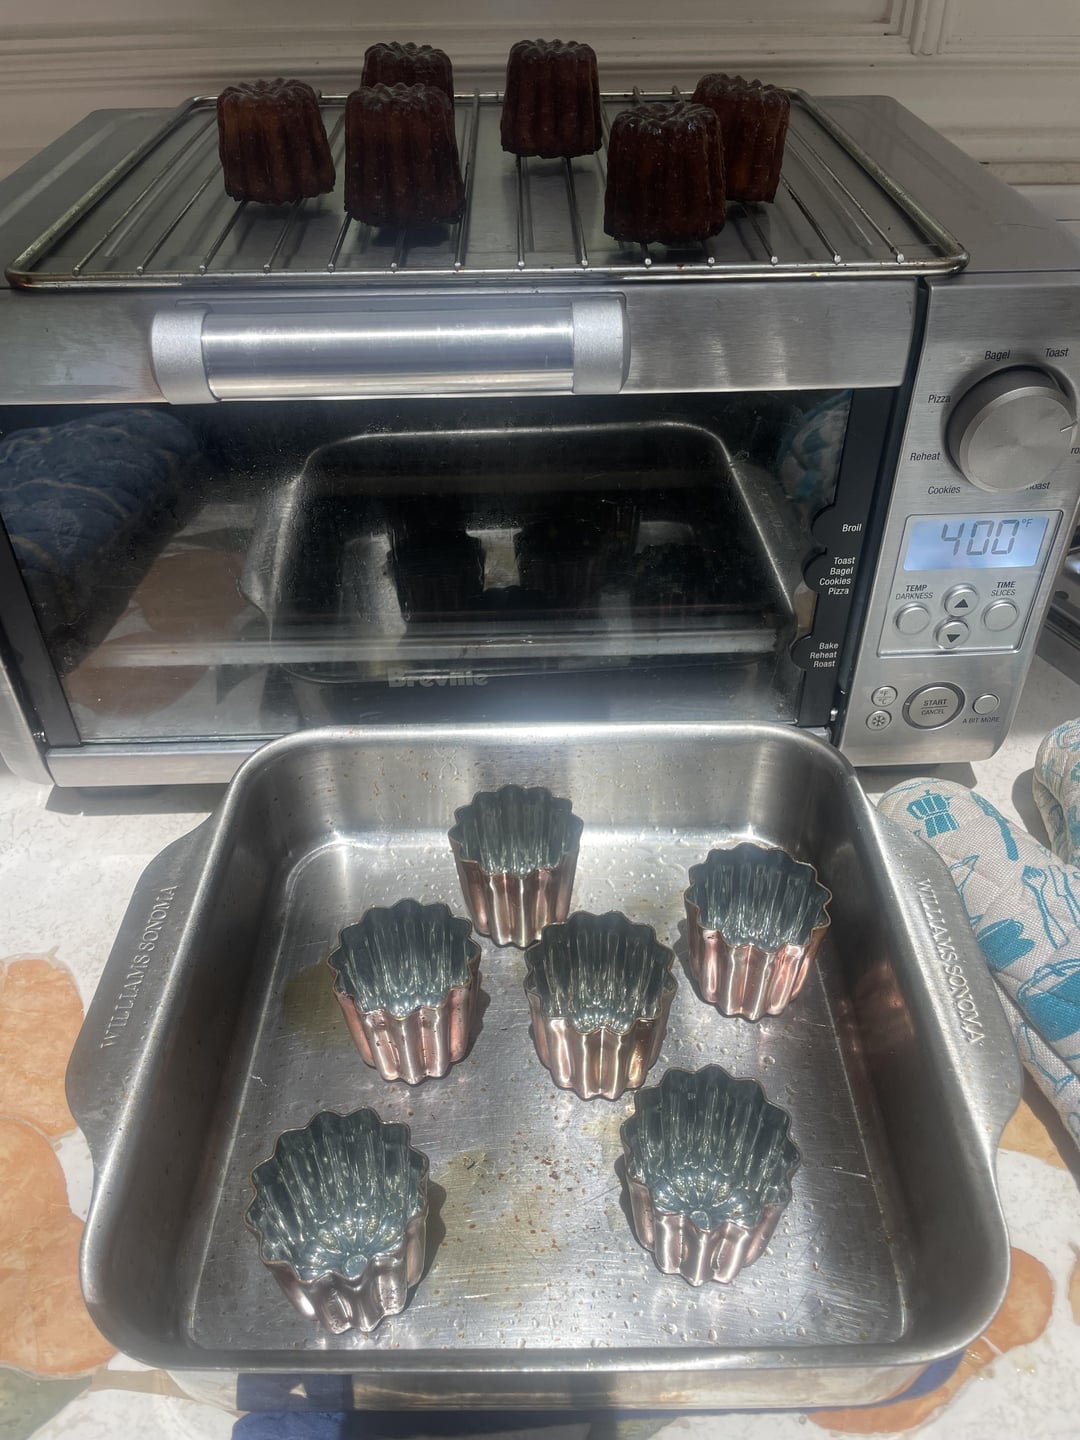
—Baking times: This was the area I felt most in the dark about. First, I was using a toaster oven which has a more limited temperature range. (Mine maxes out at 450 F). Second, I wasn’t sure how to account for my smaller mold sizes (45 mm instead of the more typical 55 mm) in terms of temperature and timing. Thankfully, I had more than enough batter to experiment. I used the “bake” setting throughout. In lieu of a baking stone, I used a steel-coating aluminum baking dish (see picture), which I preheated before placing the molds in the toaster oven.
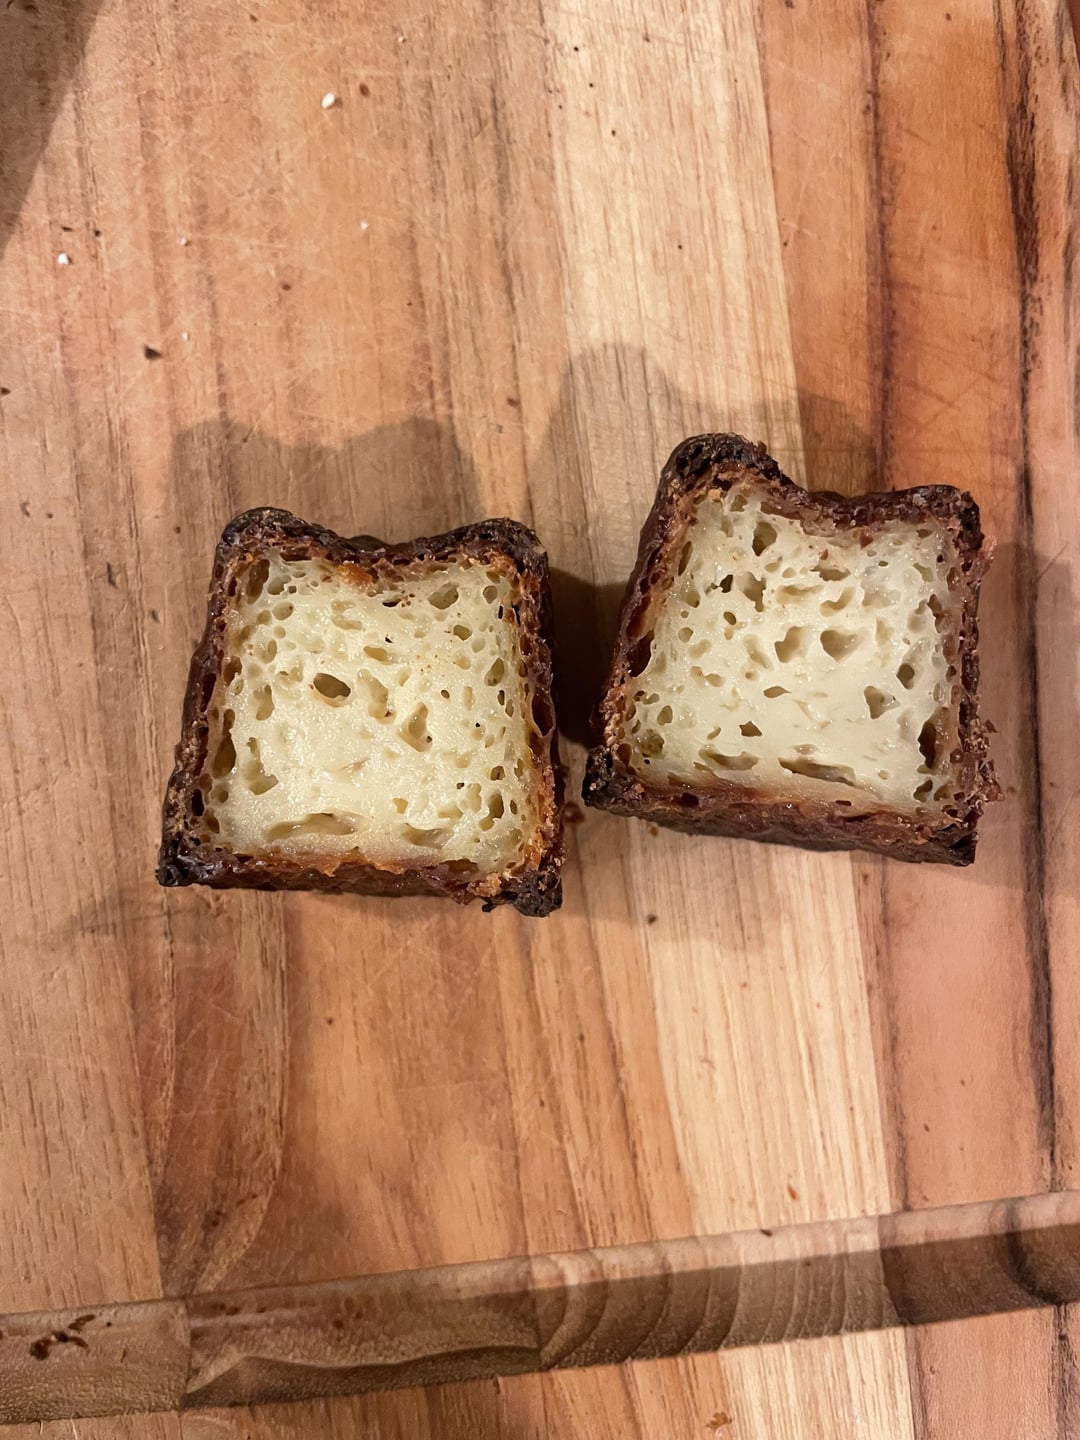
—First batch: 2 canelés, batter rested for 0 hours, baked for 13 min at 450, 375 for 2 min, then decided to do 400 for 38 minutes. They were slightly overdone on the outside (very dark), at least for my preference, and fairly custardy/a little underdone on the inside.
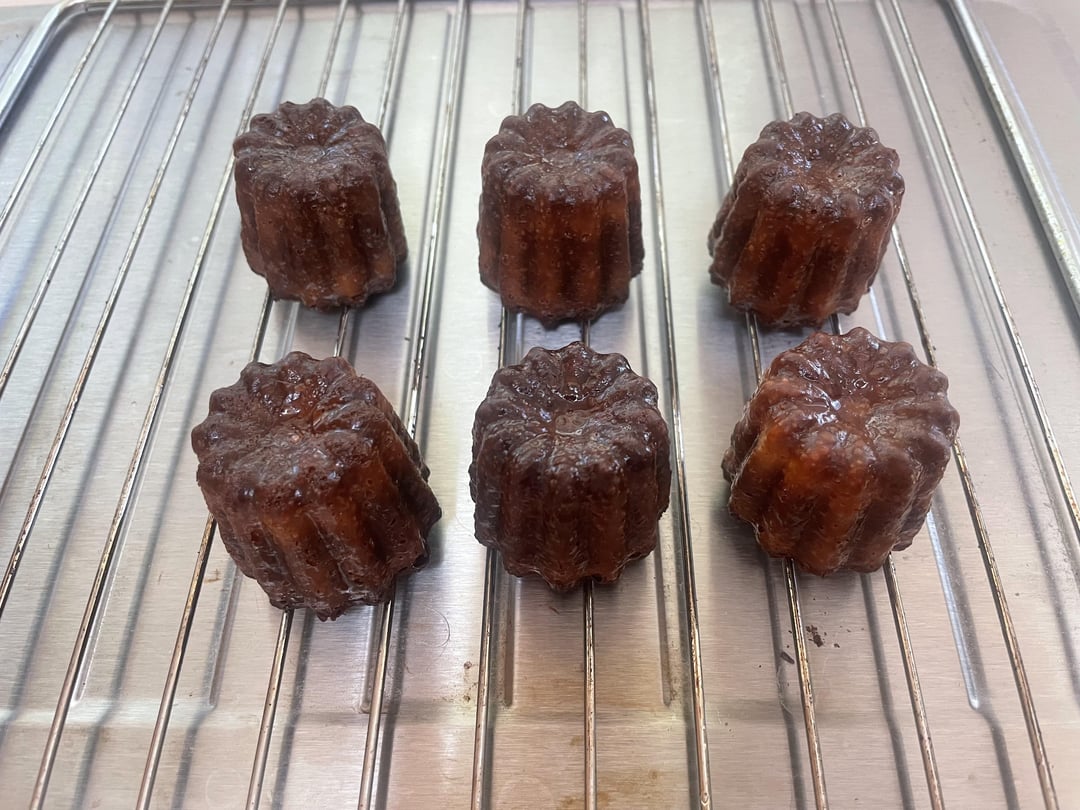
—Second batch: 6 canelés, batter rested for 18 hours, baked for 11 min at 450, then 45 minutes at 400, and the crust was perfectly cooked (see picture). But, I realized that the higher number of canelés (6 up from 2) probably meant I would need to bake them a little longer to adjust for the extra stuff. So, I did end up baking them for an extra 10 minutes at 400 just to see if I could get them a little firmer (55 minutes at 400 in total). I thought they were pretty tasty, but still a little undercooked on the inside.
—Third batch: 6 canelés, 11 minutes at 450, 60 minutes at 400. The results here were very similar to the results from the first batch (a bit too dark on the outside).
—Fourth batch: 6 canelés, 10.5 minutes at 450, 65 minutes at 380. These were the best so far! Lovely dark, but not overcooked, crust, and soft but not too gooey inside. (Also, I was a little more patient in sampling them, so they may have benefitted from being a little cooler overall in terms of the inside texture.)
For my next batch, I might experiment with dropping the initial hot bake down a minute or two more and/or adding a little more flour to the batter to see how that affects the inner texture.
by Oquassa
5 Comments
This is AMAZING! Congrats!
Making canelés is all about baking temps + times. I’ve been making them for a little over a year and there is always some variable to work with – baking 2 is drastically different than 12.
I’m very impressed that you could do this with a toaster oven. You clearly understood the mission and successfully used the tools you had on hand.
Amazing documentation and results! Thanks for sharing your detailed notes.
I have a toaster oven/air fryer combo and I love it so much. I would use it exclusively if I didn’t have things to bake that were too big.
It still blows my mind how fast it preheats – like so close to instantly vs the 20+ minutes for the big oven. I love making big batches of cookie dough and it feels practical to just bake the number of cookies I’m going to eat right away, and do that multiple times a day if I want.
When it’s hot out, it’s so nice that it doesn’t heat up the entire main floor of the house.
And most of what I’ve baked in there has not needed modification for time or temperature.
As a countertop/toaster oven baking enthusiast, I use it for baking cookies, muffins, brownies, focaccia, basically everything, going to try this! I’ve avoided attempting to make macarons, but canelés seem doable. Thanks for sharing the details of each batch.
Incredible!! Do you mind sharing a link to the molds? This is my next venture after successfully making financiers.
Thanks for sharing! Where do you get your beeswax?