

I don't get it. I did all the things that were suggested. Everything seemed ok, did the aliquot jar, cold proofed overnight, and followed the recipe from here
https://alexandracooks.com/2017/10/24/artisan-sourdough-made-simple-sourdough-bread-demystified-a-beginners-guide-to-sourdough-baking/
But as soon as it's in the oven from the cold proof, it goes to a puddle 😭
Using King Arthur bread flour
In Florida, so it's warm
I don't know what I'm doing wrong
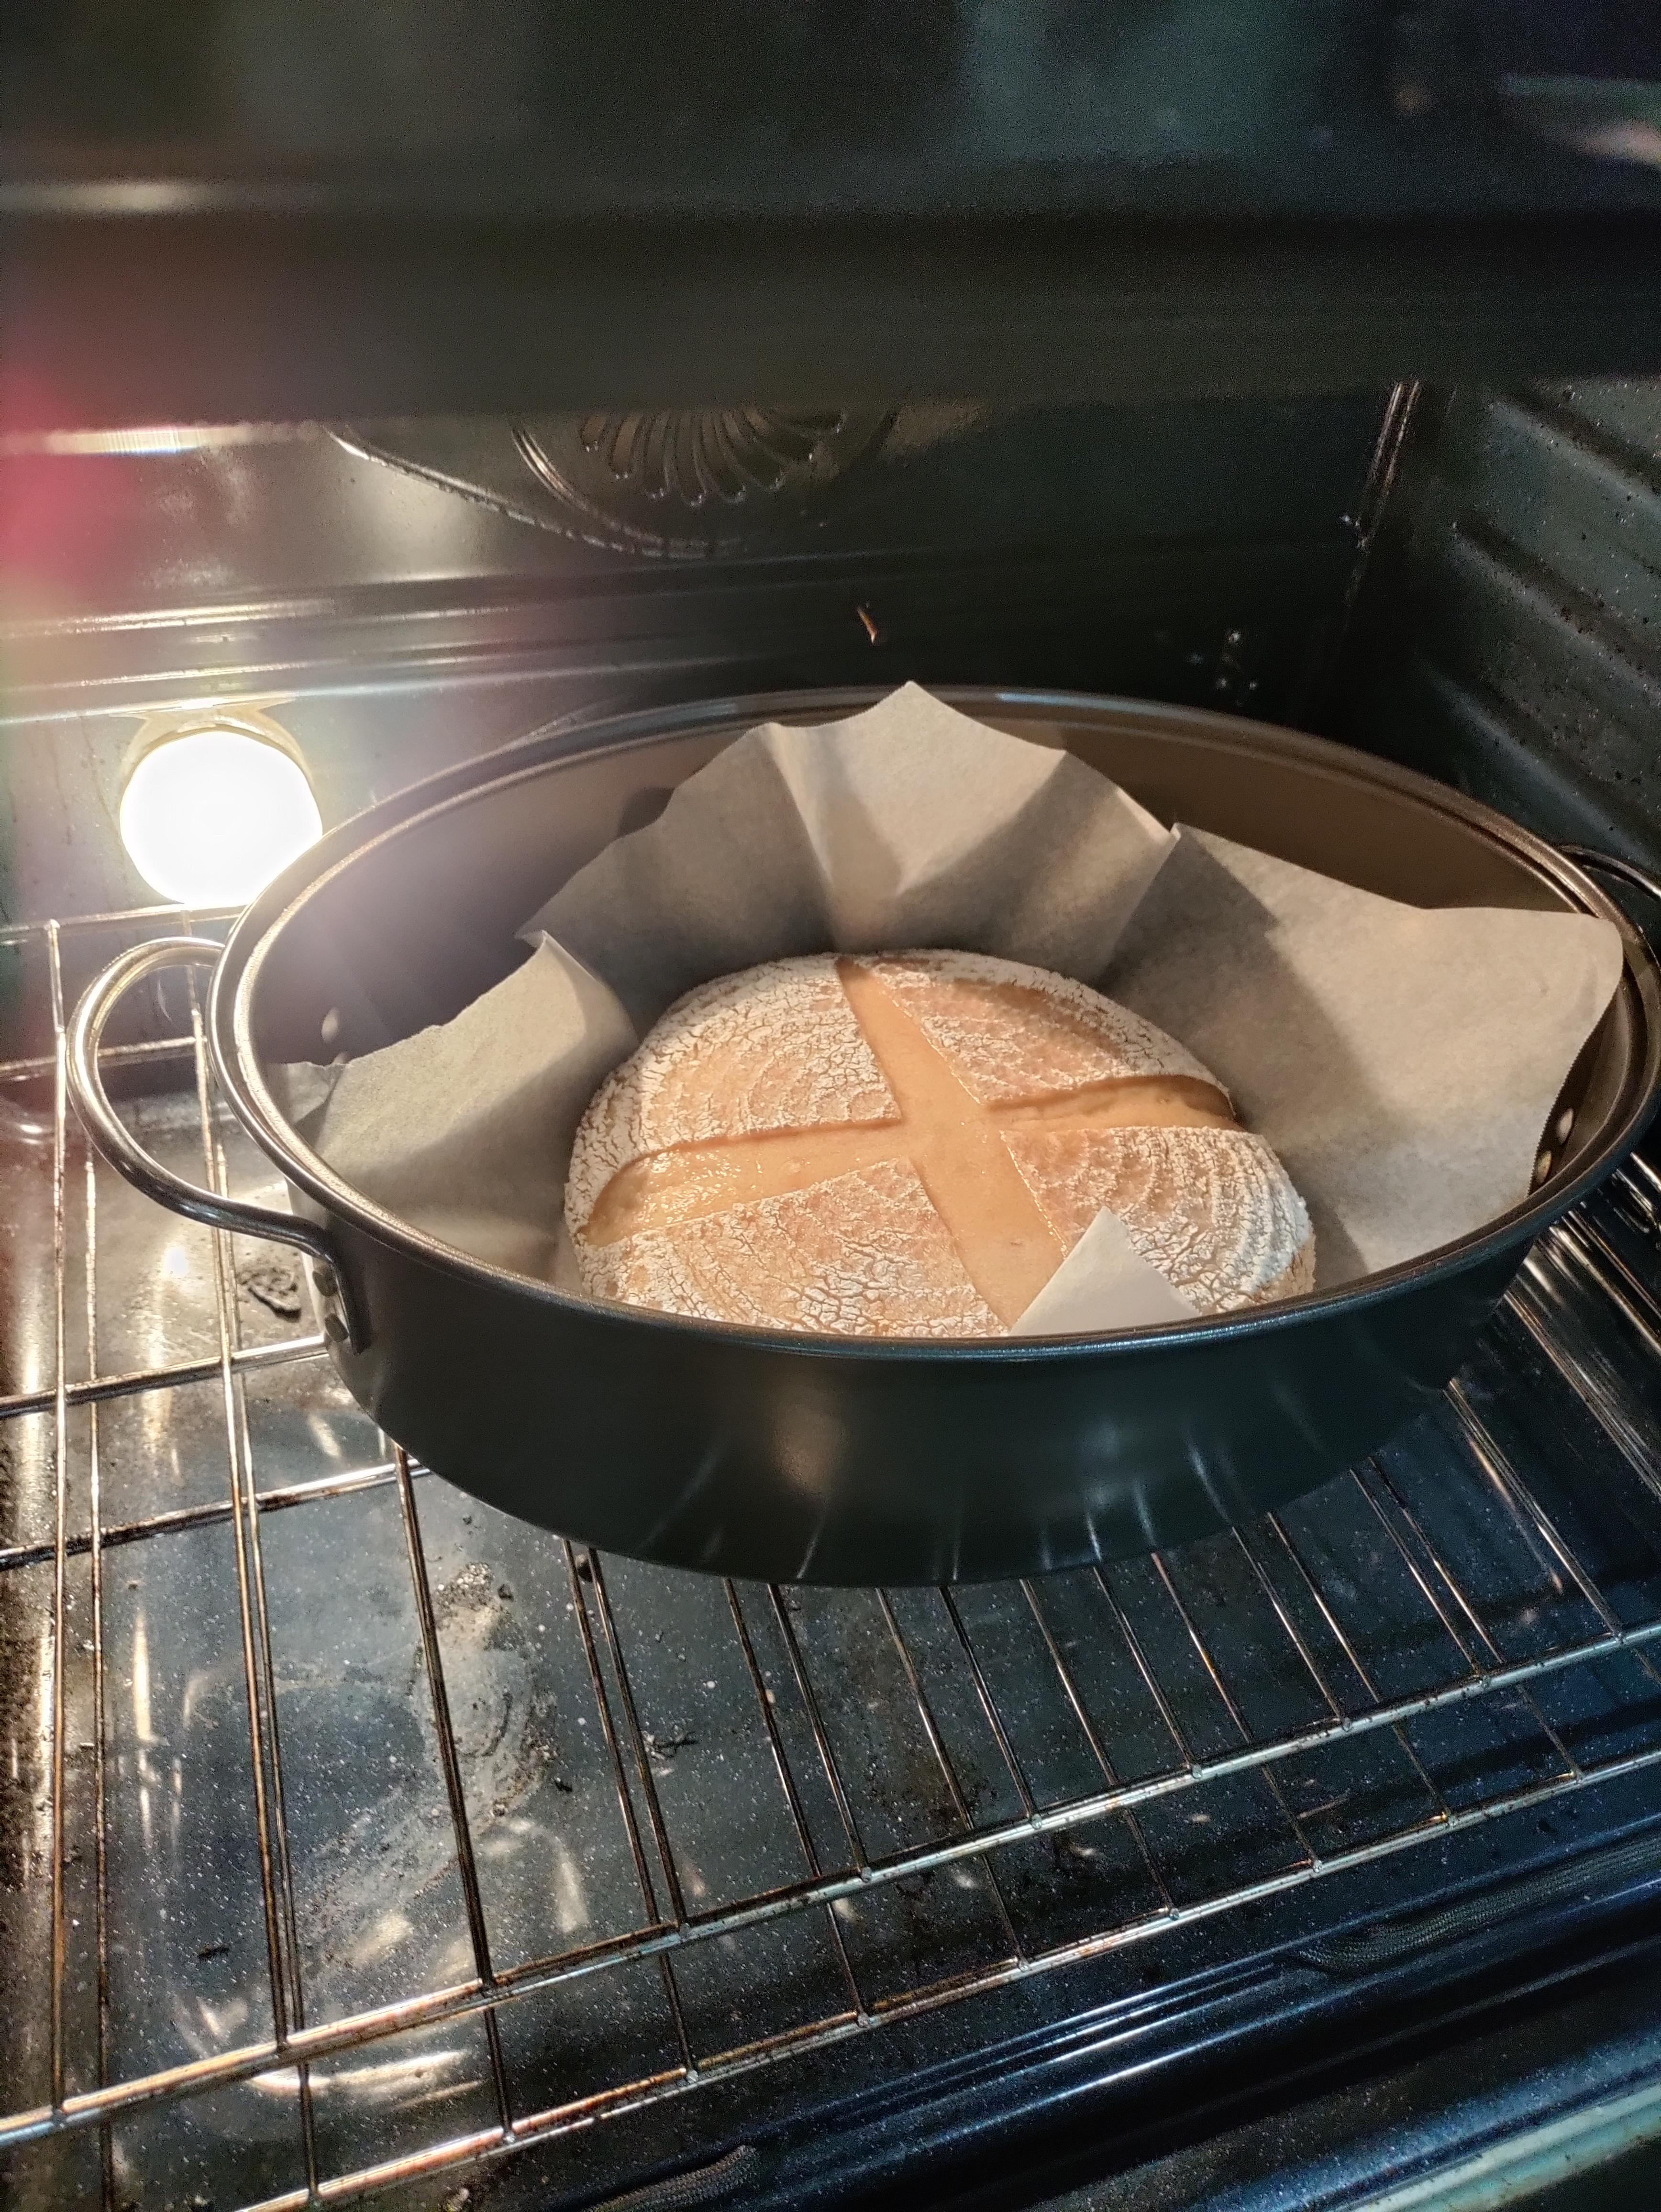
Pic is right after I pulled the lid after 20 min in 450 degree oven.
by 3shotespresso247
21 Comments
Feel like I’m just dumping flour in the trash at this point
We’ll fix it! We probably have to take it a bit slow. I’m on a train right now so can’t go deep but “puddle” implies lack of structure, over fermentation (degradation of structure), way too much water. I’m using KA BF with great success so it’s not that.
Do you have more pictures of the various stages of the dough?
Don’t get too discouraged. Just keep trying different things until you get the results you want. Also my daughter still loves the sourdough even when it doesn’t spring up really beautifully. It’s really good for grilled cheese and also just snacking on. It’s just more dense. Hang in there!!!!
If it was a puddle when you flipped out of the banneton or whatever you used to cold proof in- it was likely overfermented. Bulk ferment begins from the second starter is added to the mix and what you want to look for is:
1. Slightly domed on top
2. Jiggly
3. If a lower hydration, to be tacky when touched but not sticky. If a higher hydration, expect it to be the tiniest bit sticky
4. Bubbles on top and around the sides
5. Pulls away from the sides of the bowl without resistance
If you have all of these the bulk ferment is complete and is ready to be shaped to go in for a cold proof.
How long did you bulk ferment for and cold proof for? The recipe does state the writer lives somewhere cold whereas you don’t so you’ll not have an identical experience and will need to adjust accordingly
I haven’t baked in months, but all I can say is 77% final hydration ain’t easy friend.
Maybe tomuch water do to the humidity of Florida
https://preview.redd.it/cjoj5f9fop9f1.jpeg?width=900&format=pjpg&auto=webp&s=274e78dac577709400257be0550dc13708ed4ca4
This was my same-day loaf — a little on the dense side (same-day more like all day lol). I followed a girl’s recipe on YouTube, but I think I added too much water. It came out kind of sticky , probably from being over-hydrated. Honestly though, sourdough’s one of those play-it-by-feel things. Every oven, climate, and starter is different, so not every recipe will come out the same. My advice? Adjust based on your environment — maybe cut back a bit on the water, do extra stretch and folds, or bump up your starter. Just make sure you’ve got a solid gluten structure before the final proof.
Here’s the video I used — not gonna lie, it really does take all day. [https://youtu.be/XsZKziwWpRI?si=7IK4aoupnv3LE-yI](https://youtu.be/XsZKziwWpRI?si=7IK4aoupnv3LE-yI)
How old is your starter? And how long before starting rhe dough do you feed it?
When testing the dough during the bulk ferment, if it sticks to your finger it isn’t proofed properly. It should leave a light indent when poking it, not stick, and spring back just a bit.
I have the very best results with Red Mill Artisan flour. I’ve used King Arthur’s for about 3.5 years, had good results baking sourdough breads consistently, but using Red Mill Artisan flour is another level of good. Now I have excellent consistent results with great gluten development. It’s Artisan flour from here on out for me.
Goal!
I don’t like that recipe one bit. No autolyse and only a 30 min fermontolyse before immediately jumping into stretching and folding is just not gonna give you the structure you want and the result will be pucks.
You don’t need an autolyse but your fermentolyse should be at least 1 hour. After that you MUST shape your dough. Form up a dough ball by hand and then give it a covered rest for 30 min. Only after the 30 min rest should you begin the stretching and folding
i’m new to bread making, but looks like not enough gluten strength case
1. mix the flour more thoroughly and maybe try autolyse, even a short one. (it makes the dough way more forgiving and develops gluten strength)
2. try lower hydration 60-70% (you wont get the big holes, but they are overhyped anyways)
3. do gentle coil folds and wet your hands when shaping the dough to prevent it from sticking
The time I ended up with a hockey puck was a high hydration recipe like the one linked. I’ve had consistently good results with lower hydration recipe from pantry mama.
https://www.pantrymama.com/how-to-bake-simple-sourdough-bread/#wprm-recipe-container-4678
The recipe calls for 350 grams of water. I normally pour in about 345 grams of water and see how the dough comes together. Sometimes I need more, sometimes it’s perfect depending on the humidity.
You’ll figure it out! I’m in the same boat, on my 3rd starter and haven’t had a great loaf yet, but they’ve all tasted good and found a purpose in someone’s stomach lol. I made the mistake of trying to make one during the heatwave, made a pretty tasty focaccia 🤣
I feel your pain. I’ve been there.
If you really want to learn to bake bread, start with [baker’s percentage](https://www.kingarthurbaking.com/pro/reference/bakers-percentage) and [flour composition](https://www.kingarthurbaking.com/blog/2023/09/25/protein-percentage). I wish I had. Bakers use those tools to tune the characteristics of the bread they want to bake. They’re invaluable. Also, check out [The Sourdough Journey](http://thesourdoughjourney.com) It’s a great resources for beginning bakers.
When shaping, the dough should feel like a balloon. Shape the dough to build tension and make the balloon tighter, but not too tight. That feel comes with experience. The dough should remain inflated and bulbous, and rounded in the banneton. [This shaping video](https://www.youtube.com/watch?v=vEG1BjWroT0) from [SFBI](https://www.youtube.com/@sanfranciscobakinginstitut7055) really helped me. If it flattens in the banneton the next morning, after you’ve done your overnight retard, (because you do do an overnight retard, right?!), the bread will probably be on the flat side. But you’ll know i advance.
I like my loaves a little darker. The [Maillard reaction](https://en.wikipedia.org/wiki/Maillard_reaction) is your friend. Check out these loaves from [Tartine](https://duckduckgo.com/?t=ffab&q=tartine+bread&iax=images&ia=images), a famous bakery in SF. They’re smoky with hints of caramel. You’ll have to singe a loaf or two to know where the line is.
Finally, don’t be discouraged. I’ve had a lot of bread disappointments over the years, especially the moment I call “the unveiling”, when I remove the lid from the dutch oven and see the result of my labors. But I’ve reached a point where you can bake good loaves reliably, without a recipe.
You’ll get there.
Happy Baking!
It happens! Turn it into bread crumbs and freeze it. Great use of bread that doesn’t turn out.
I use the same recipe. I am not sure if this is the problem, but after you preheat the Dutch oven in the oven to 550, you add the bread, cover with the preheated lid, and drop your oven to 450. You keep it like this for 30 minutes before taking off the lid and dropping your oven temp to 400 for 10 – 15 minutes. You say in your post that you take the lid off after 20 minutes at 450. It should be 30. That is a large time difference as a percentage of the cook time.
I know it can be so frustrating!! I am new to this journey!! Try a different way. I am in Alabama, so pretty comparable with the heat. I do: I use KA bread flour organic
* 100g active starter
* 300g room temperature water Mix those two together
* 10g of salt Then mix
* 450g flour.
I mix all together and let rest for 1 hour. Then 4×30 minutes stretch and folds. I no longer let it proof on the counter over night, it almost over proofs on me. I did about 5 or 6 hours yesterday and then shaped and put in the refrigerator overnight. I heat my Dutch oven in the oven while preheating to 450 degrees. I place my dough on parchment and then score, I do that right out of the frig and about to go in the oven. I place it in the Dutch and then poor water into the Dutch behind the parchment. Hurry and put the lid to catch steam. I place it in the oven covered for 50 minutes. After 50 minutes I check its color and usually do another 5 to 7 minutes with lid off. I check the temp of the bread looking to be 205 to 210 degrees. I just took this loaf out right before typing this!! Please don’t give up, just keep tweaking it. I also made an inclusion loaf today and I think I have finally got that down pat. You got this!! Happy baking!! Also, my A/C went out last night so my home is running 81, normally about 75. It is about 95 outside today!!
https://preview.redd.it/f6uf1ugeeq9f1.jpeg?width=4032&format=pjpg&auto=webp&s=ceb0f56c756509e0754558e154d366a1773f6158
I can’t overstate how much the time/temp proofing chart thing has helped me. It feels like cheating.
Cold proofing does nothing but develop flavour and it seems you over proofed.
Be patient.
People rarely get it right the first time and when they do, it’s a fluke they can’t repeat until 2 or 3 dozen bakes later.
They say that you don’t fully understand and don’t fully get it right until you’re hundredth big. I used to think that was stupid but I believe it now.
This is not yeast in baking which is levels easier and much more forgiving than baking with sourdough starter. In many ways, sourdough baking can be unforgiving as it highlights every mistake that you make–and there will be many. However, every mistake is a learning experience and every mistake is completely edible and delicious about 99.9% of the time. There’s so much nuance and things to remember but even telling you everything now will not sink in. You just need to learn as you go and understand that you don’t know what you don’t know and that’s okay.
Good luck.
Well it’s not even done!! Mine look like this too after 20 mins. 28 more mins and it’ll be properly cooked