

Hello lovely people,
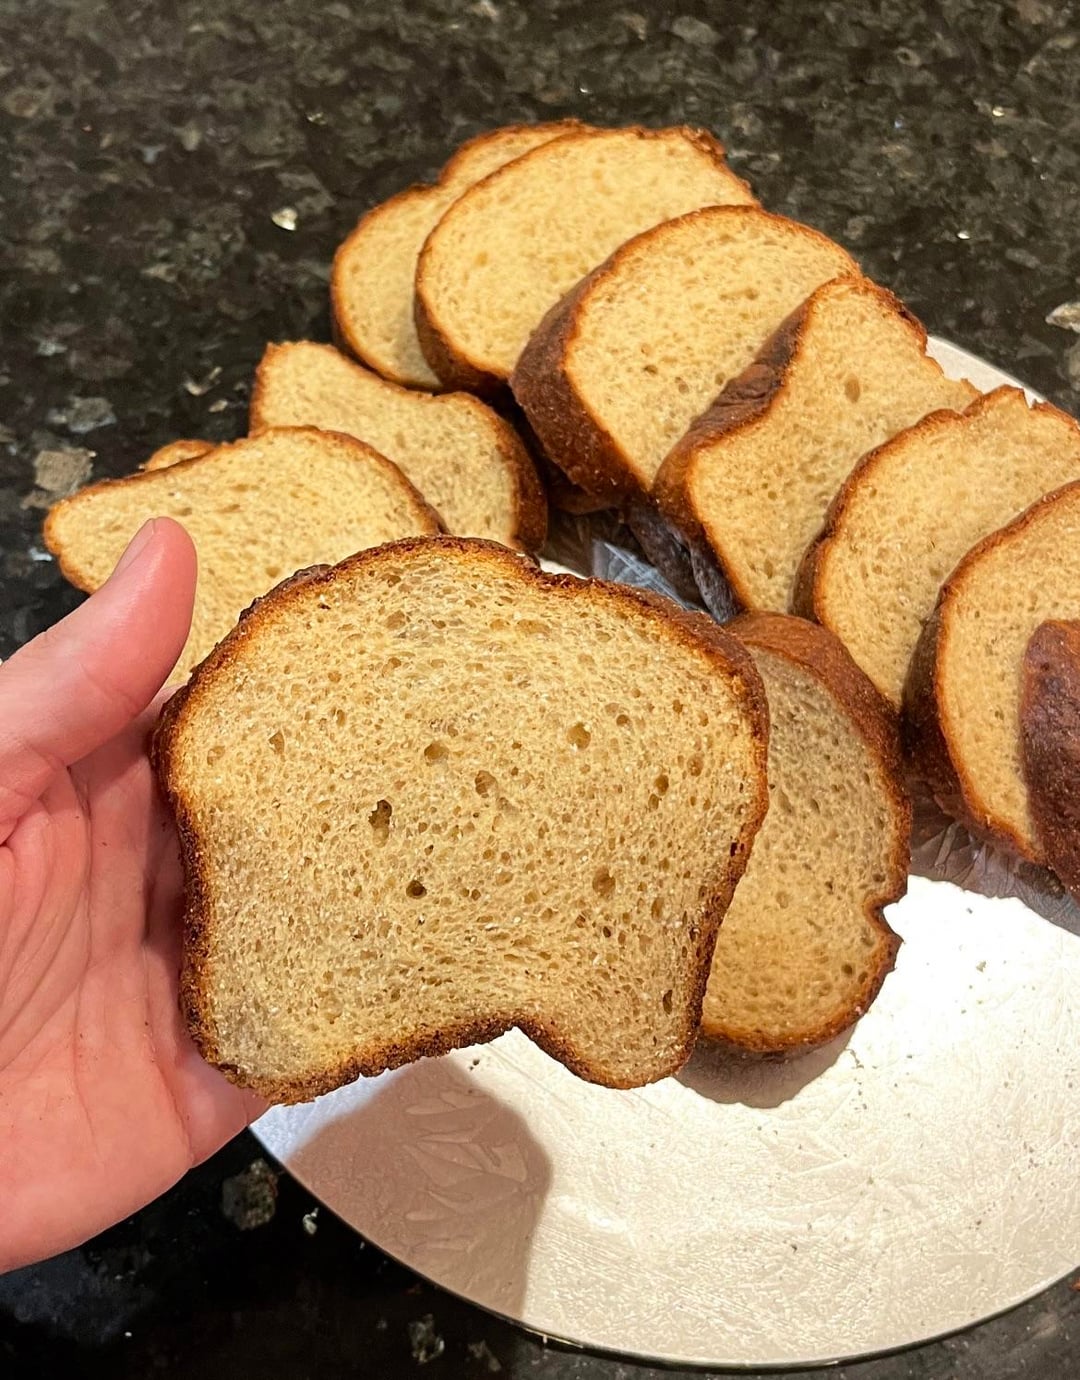
I recently stumbled across an absolutely delicious keto white bread. It tastes like normal white bread – it’s slightly sweet but savoury at the same time, making it perfect for sweet spreads and for lunch or dinner sandwiches. It’s everything I want in a bread: it’s soft, it’s versatile, and it fits my diet.
My problem is that this delicious bread is $11 per loaf, and it only lasts me 2-3 days…
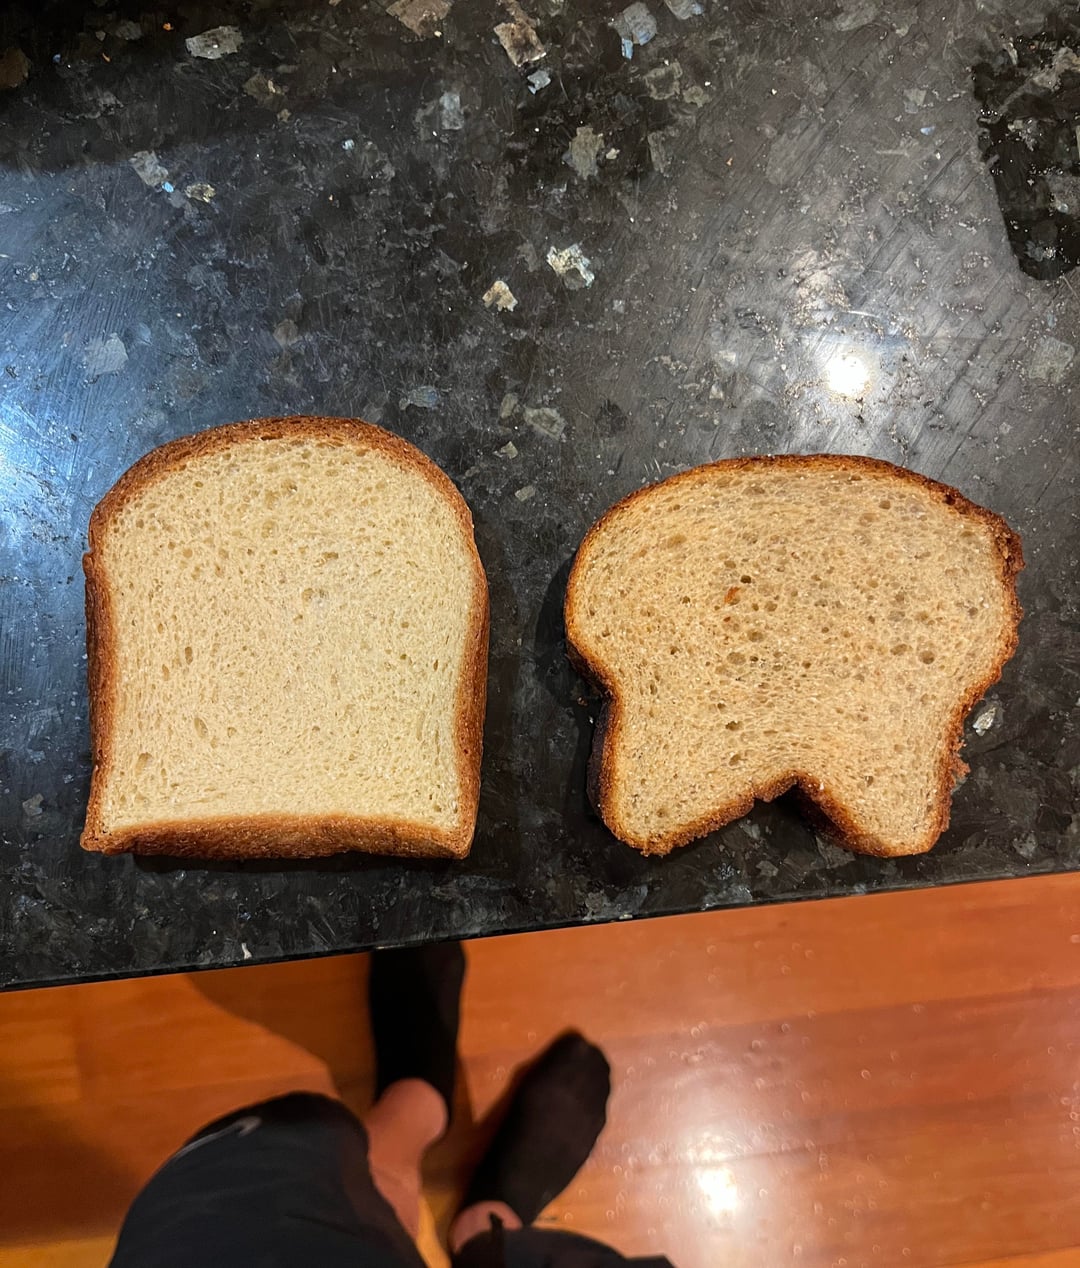
So, I decided to do what any normal person would do – I read the ingredients list on the back, purchased myself a loaf pan, and decided to just estimate everything based on the exact order of ingredients. In my country, food manufacturers must list ALL ingredients on the label – so this made it slightly easier for me. The first attempt was pretty close but overall I wasn’t totally happy, but today I cracked it – or at least I got incredibly incredibly close. And today I also wanted to share this delicious recipe with all of you to enjoy. (The last pic shows the store bread, left, versus my homemade bread, right). I firmly believe that being healthy shouldn’t cost us 3x-5x the normal price – it’s kind of ridiculous how much we get ripped off at the grocery store because of our diet.
Anyways enjoy!
Ingredients
– 150g (2/3 cup) warm water (40°C, 104°F)
– 1/2 tsp white sugar or inulin (for feeding yeast only – the yeast actually eats the sugar so it doesn’t add to the carb count – just don’t add more than 1/2 tsp. if you prefer to not use sugar, inulin is a keto option but both will be eaten by the yeast)
– 8g yeast (≈2 1/2 tsp. this part is quite important – instead of instant yeast try to use a yeast with added dough conditioners for a softer bread like texture – I use a mix called surebake which improves texture and adds negligible carbs. however instant yeast will work pretty great too. up to you)
– 10g olive oil
– 5g apple cider vinegar
– 150g vital wheat gluten (yes it’s a lot but just trust the process. be cautious about the carb count on your vital wheat gluten – some brands have very very low carbs but some other brands can be shockingly high. I compared a few options online and ending up getting mine from a vegan store, it has 7g carbs per 100g – for 15 slices it’s quite negligible)
– 42g almond flour
– 28g coconut flour
– 1 1/2 tsp xanthan gum (don’t skip this – it dramatically improves the texture)
– 1/2 tsp salt
– 5g plain flour (yes real flour – we only need a tiny bit for feeding yeast and vastly improving the bread like texture. if you want the bread even more white, use up to 10g plain flour – but do not leave it out completely)
– 20g erythritol + stevia blend (I use a blend that is 2x as sweet as table sugar – granulated or powdered is fine – but powdered is preferred)
Instructions
1. Proof yeast: Use a microwave and a glass bowl to heat the water to roughly 40°C (I use a thermometer, it usually takes about 30 seconds). Next, add sugar/inulin, sprinkle yeast, and wait for AT LEAST 10 mins until foamy. Whatever you do, do not rush this part – it’s vital.
2. Mix dry: Combine all dry ingredients.
3. Make dough: Add yeast water, oil, vinegar. Mix, then knead 8–10 mins until smooth.
4. First rise: Cover, and proof for 60–90 mins until doubled. To do this, I turn my oven on min temp for 1 minute and then turn it off, including the light. Boil 1.5 cups of water and put it at the bottom of the oven- then put your covered dough in.
6. Shape & second rise: Form it into a log, and put it into a lined loaf pan. To line the loaf pan, I first spray it with olive oil spray and then line only the bottom and the two longer sides with a single sheet. Then I give all sides and the bottom a quick spray with more olive oil. Additionally – your loaf pan is important. do not use a glass loaf pan, and preferably use a good tall one – unfortunately I didn’t have time to get a proper tall loaf pan, hence the slightly off shape. Proof for 45 mins. At this point, it should be doming above the rim. If it hasn’t domed that much yet, your yeast may not be totally activated or it may need an extra 15-20 mins.
6. Bake: 180°C (355°F), 30–35 mins, internal temp should read 95°C (203°F). Tent with foil if browning. I baked mine for exactly 33 mins.
7. Cool & store: Cool fully before slicing, important! Store airtight 4–5 days or freeze.
Storage: This bread seems to prefer being refrigerated airtight – the only ingredient that it doesn’t contain compared to the original is calcium propionate, an ingredient which helps prevent molding. If you have some at home feel free to add 1/2 tsp with the dry ingredients for extra mold protection. It’s not a huge loaf so it’s fine without if you eat it in a few days.
Anyways please let me know if you make this bread, and I hope you all enjoy it as much as I did! And I’m open to hearing your opinions on how I might improve this recipe, if you have any.
I love experimenting in the kitchen, especially reverse engineering my favorite foods and snacks. There is something incredibly satisfying and exciting to me about biting into a homemade bake that tastes EXACTLY like the product you buy at the store for like 5x the price. So far I have made several knock off protein bars, cookies and now bread.
Have a lovely day guys! 🙂
by flynncorp
15 Comments
I just realised I didn’t add US measurements to all of the ingredients, sorry! 🙂 For my American friends here is the full ingredients list:
Ingredients
– 2/3 cup warm water (104°F)
– 1/2 tsp sugar or inulin (for yeast only)
– 2 1/2 tsp yeast
– 2 tsp olive oil
– 1 tsp apple cider vinegar
– 1 1/4 cups vital wheat gluten
– 1/2 cup almond flour
– 3 tbsp coconut flour
– 1 1/2 tsp xanthan gum
– 1 tsp salt
– 2 tsp plain flour (just for yeast)
– 1 ½ tbsp erythritol/stevia blend
I can’t find a carb count. Is it there and I can’t see it?
I know that you only followed the recipe but I get the feeling you are a much better baker than I am, so I will ask you, is there anything I can swap the wheat gluten with? Extra gum? Other types of gum?
Wow that looks great! Thank You! Adding to my recipes.
Signed, an American 🇺🇸 who uses kitchen scales 😅
Thank you!
I love the reverse engineering of overpriced products!
Nice! With this reaching $5 at the grocery store for a basic loaf, once the weather gets cooler, I am looking forward to keto bread baking.
Whenever I use coconut flour, it seems to absorb moisture from the air and everything around it. So it’s better stored in the fridge for me too.
Thank you, looks great!
Love this and thank you for sharing! I may try without the xanthan since I’m trying to avoid emulsifiers since they can disrupt the gut. Wondering how much it will affect it.
The crumb looks great
Saved!!
What other stuff have you reverse engineered?
Have you tried this recipe for any other bread products? Like burger buns or rolls?
Yay YOU; thanks, we’ll give it a try. What it the brand name of your favorite?
You’re a kitchen nerd. JK, Haha. I’m a kitchen nerd too. Any chance you have the macros breakdown for this?
So, I recognize and applaud your work. It’s really awesome. But I’m curious, how much do the ingredients cost per loaf and how much time do you spend on the effort (purchase, prep, cook, cleanup)?
Don’t get me wrong, I’m all about DIY and saving money, but sometimes it’s not worth it. For me, a loaf of keto bread here in the US is $5-$6. I estimate my time as worth about $80 an hour. So it’s not really worth it to me to make my own.
Now, I also understand homemade vs store bought with all the “crap” added, so there is also the value in lowering that as well.
Pretty awesome that you were able reverse engineer the product.