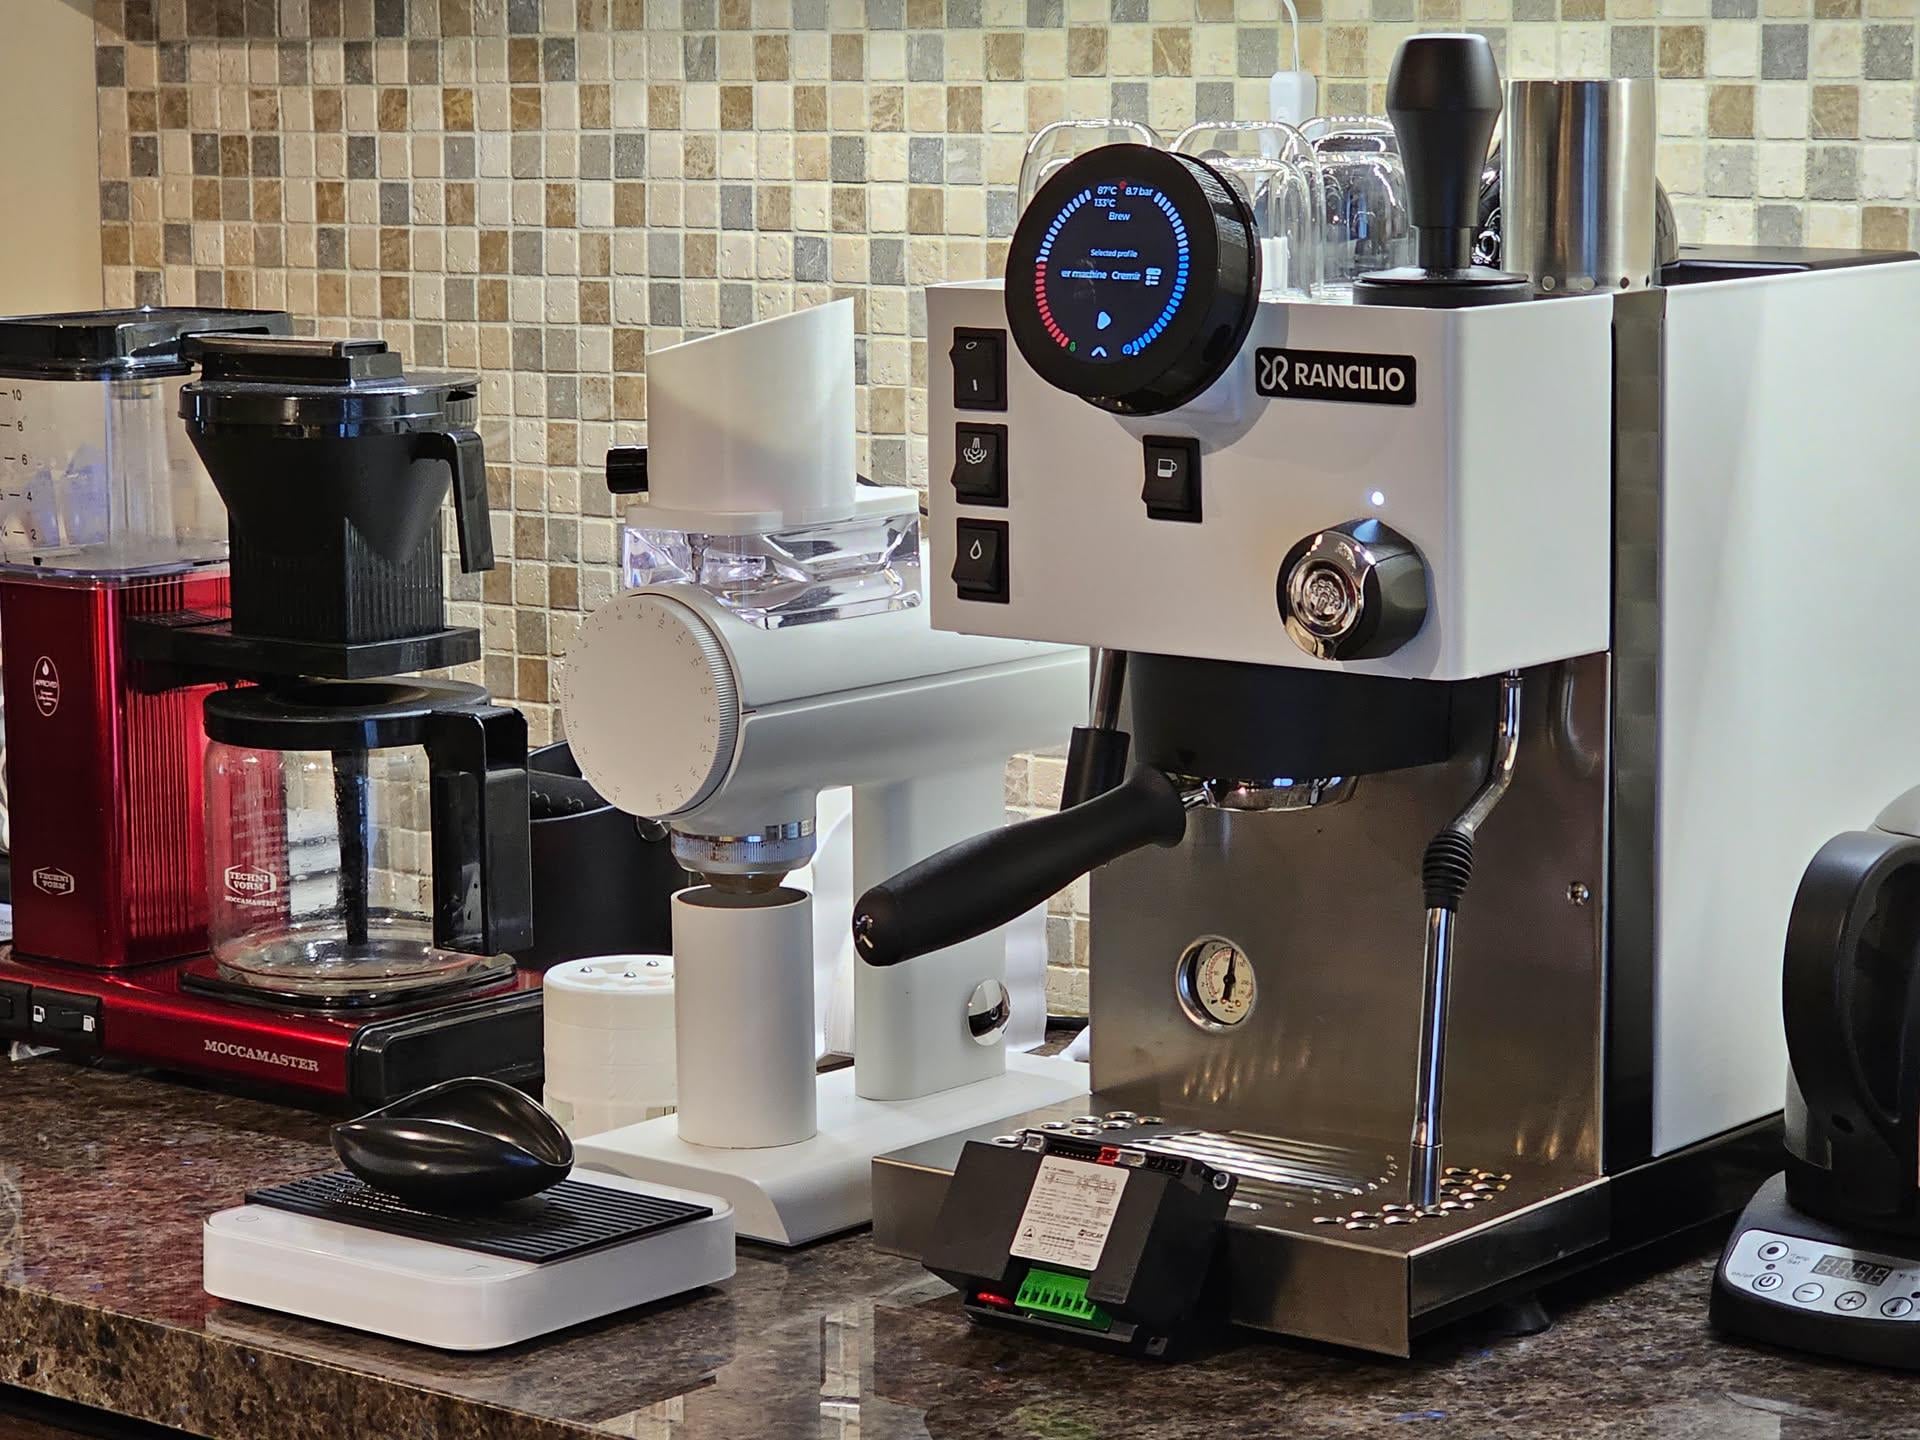
I wanted a solid base that I could mod and chose the SPX. In stock form, it’s a good machine but has its drawbacks. With the Gaggimate, I believe it’s one of the better machines overall and I’m planning on this being my endgame setup.
Besides controlling flow, pressure and temperature, Gaggimate also controls both boilers. None of the stock wiring, plumbing or devices have been modified and all are used for feedback/control (temperature sensors, level sensors, ssrs, pumps, led, switches).
Next steps will be to transplant my now defunct Gaggia OWC hardware scales into the drip tray, add a cool touch steam wand and that’ll hopefully be it hardware wise.
edit:
Installation was straight forward as I made an adapter board with sockets for all of the existing components plugged into the Gicar. All of the cables unplugged from the existing control unit and into my adapter board. From there, it’s a couple of cables to the Gaggimate unit that sits at the front of the case (below the brew switch). A standardized adapter board would make this extremely simple to install as it would literally involve transferring plugs from one unit to the other.
This can also (partly) be done following the standard Gaggimate installation for the regular Silvia but keeping the Gicar/Display for the steam boiler control and tank level. This involves adding a thermocouple in place of one of the two existing high limit thermostats on top of the brew boiler and adding an SSR for the brew heater.
While this isn’t as ‘nice/complete’ of a package as my method, it still functionally gives you all of the brew pressure/flow profiling and temperature control, which is 95% of the way there anyways.
Cafe_Roaster
This is sweet. What was the install process like?
VVKoolClap
How much was the install
Frosty1887
Really interesting! Looking forward to reading more about this!

4 Comments
I wanted a solid base that I could mod and chose the SPX. In stock form, it’s a good machine but has its drawbacks. With the Gaggimate, I believe it’s one of the better machines overall and I’m planning on this being my endgame setup.
Besides controlling flow, pressure and temperature, Gaggimate also controls both boilers. None of the stock wiring, plumbing or devices have been modified and all are used for feedback/control (temperature sensors, level sensors, ssrs, pumps, led, switches).
Next steps will be to transplant my now defunct Gaggia OWC hardware scales into the drip tray, add a cool touch steam wand and that’ll hopefully be it hardware wise.
edit:
Installation was straight forward as I made an adapter board with sockets for all of the existing components plugged into the Gicar. All of the cables unplugged from the existing control unit and into my adapter board. From there, it’s a couple of cables to the Gaggimate unit that sits at the front of the case (below the brew switch). A standardized adapter board would make this extremely simple to install as it would literally involve transferring plugs from one unit to the other.
This can also (partly) be done following the standard Gaggimate installation for the regular Silvia but keeping the Gicar/Display for the steam boiler control and tank level. This involves adding a thermocouple in place of one of the two existing high limit thermostats on top of the brew boiler and adding an SSR for the brew heater.
While this isn’t as ‘nice/complete’ of a package as my method, it still functionally gives you all of the brew pressure/flow profiling and temperature control, which is 95% of the way there anyways.
This is sweet. What was the install process like?
How much was the install
Really interesting! Looking forward to reading more about this!