For my Granddaughter’s 16th. Any constructive criticism is appreciated.
by davejr
21 Comments
jimmytwotime
It came out excellent, no notes other than practice will make it better, but that’s not a criticism. Great job!
Any_Grape5116
This looks absolutely beautiful!! Great job!
Timely-Profile1865
Very nice, love the colours and the flowers.
rewindpaws
Nice, clean, not overdone. It looks well edited.
Itchyfingers10
It’s beautiful.. You’ve made a cake that you deserve to be very proud of. Your granddaughter will love it!
Spacelady1953
Very pretty. Lovely flowers
Klutzy_Arm_7930
I’d say you nailed it
heckyeahcheese
Seriously good job
sashby138
This is a pastel dream!!! I love it and would love to live on this cake.
bocacherry
Lovely!
KirbyRock
Well done!
chingona7
Very beautiful and amazingly done for a first attempt! You’re a pro 😍😍💙
Breatheitoutnow
Beautiful job!
keridc
This looks amazing OP! Your granddaughter will be super excited! You are very talented!
The_mighty_pip
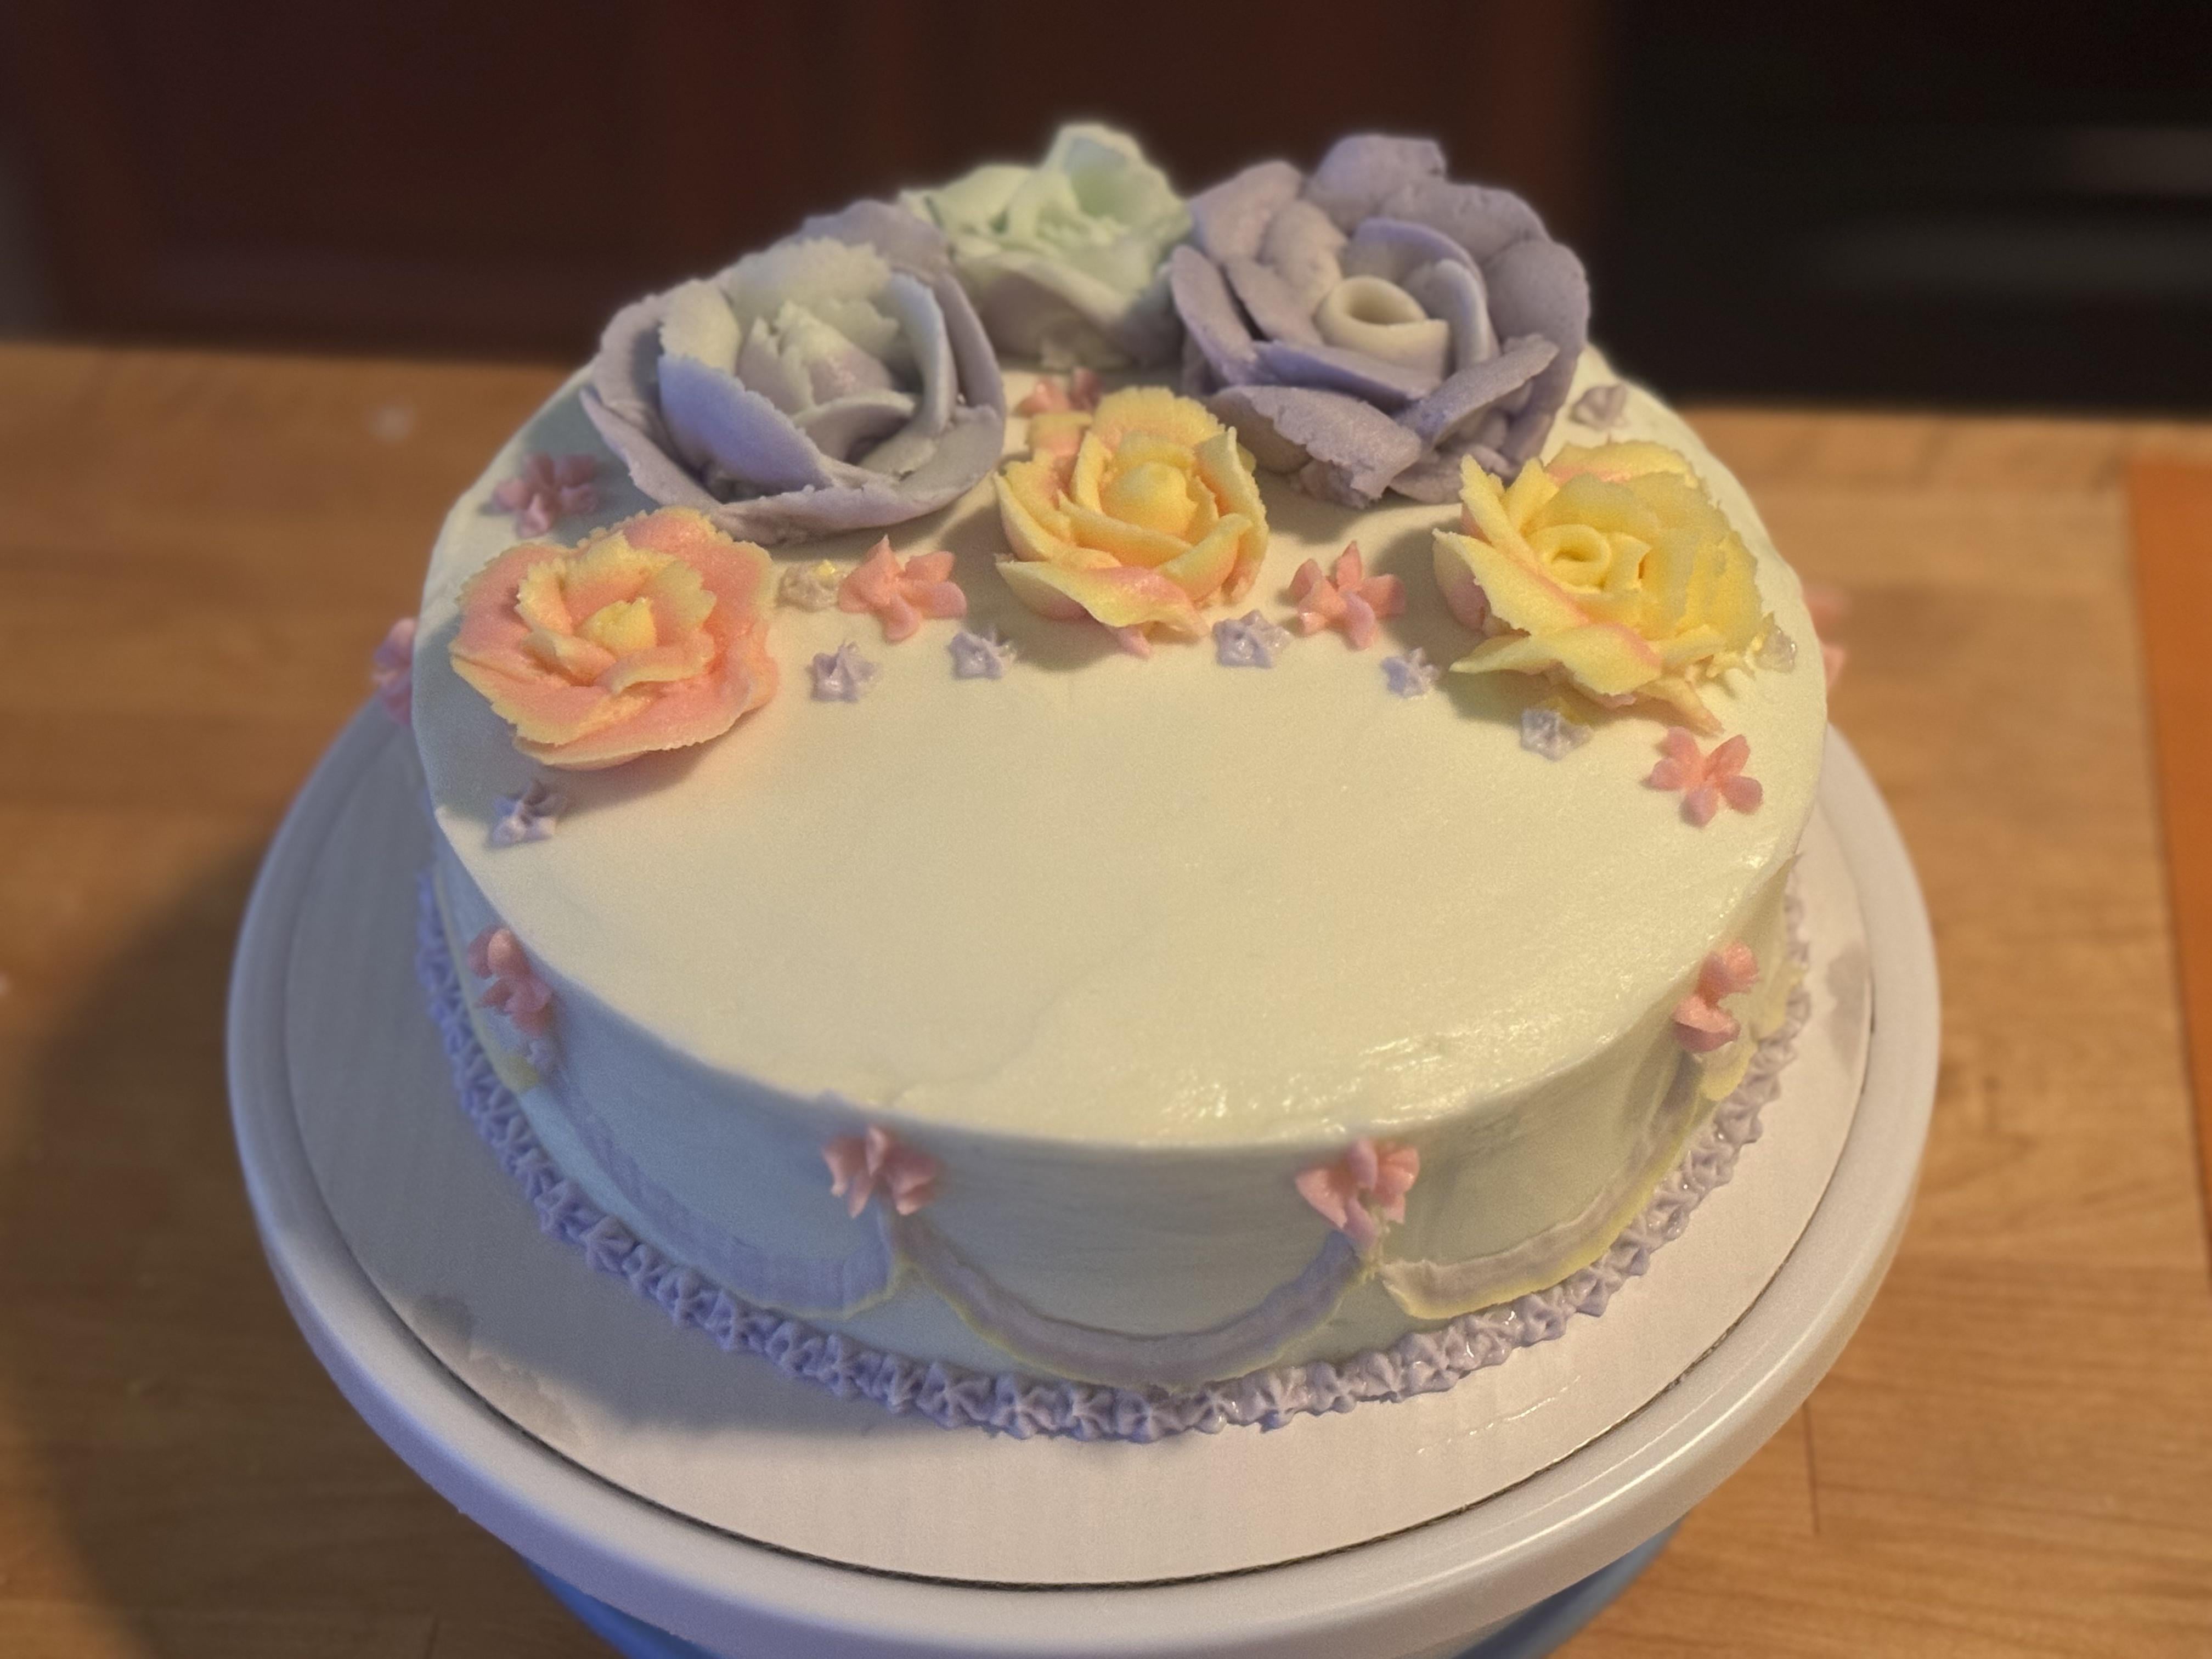
Pastry chef/baker with 40 years experience. You did a fantastic job, but I’m answering your call for tips/tricks, so here does. 1. Frosting. Your frosting looks pretty spot on except at the top edge. If you are going to have a bare top edge on a cake, the frosting has to be absolutely perfect and even, as if the bc was sprayed on. 2. Borders. When you make the borders for the top and/or bottom of the cake, consistency is key. Whether using a star tip or a drop flower tip, each component has to be the same height and width as the one before. I love the dainty border on the bottom, but I’d like to see you bump up your skills to make the little drop flowers more even. 3. String/ribbon work. I am very impressed with your ribbonwork on this. Did you use a rose tip? Great job. Once again, you are aiming for consistency, this time in pressure when applying the ribbon. I hope you continue to work on this, because you have natural skill with this. But a tube cake pan, turn it upside down, and use that to practice on. 4. Roses. Your roses are pretty well made, but you’ll notice that they are sunken in the middle. I suggest using a 104 rose tip and a size 7( I think) rose nail. Using your bag with the rose tip, pipe a tight but medium size blob of bc on the nail. Now imagine you’re looking at a click, and where the numbers are on that clock, okay? Hold the bag with the bottom of the rose tip pointing at 7 o’clock. Pipe a tight cone on that bc blob. Make sure it has a small opening at the top. This is the middle of your rose, and it will be the highest part of your flower. The next row of petals only gets 3 petals, and you will hold your tip at the 8 to 8:30 position. Next row gets 5 petals, holding your tip at the 9 o’clock position. Your final row of 7-8 petals will be piped holding the tip at the 9:30 position. Now you can add or subtract rows of petals to make larger or smaller roses, and they will have the dimension needed. 5. Leaves/stems. I really like a few leaves added unless the entire top of the cake is covered in flowers. I exclusively use a number 32 leaf tip, and for stems, I use a 3,4,or 5 tip. I wish you luck, and remember to have fun!
Working-Ad-3253
You made a beautiful cake
GrapeMiserable4081
I gotta say, great job on the colors.
I find a lot of the time I over-saturate them, or make them too dark.. and elegant flowers simply come out too cartoony and fake. Those look quite soft/pale and real.
It’s super clean.
She’s lucky to have you make that for her!
Minamu68
That is beautiful!
PeachAndBlueberry
First serious victory.
Imlikeadove
It’s beautiful 😍 I love it!! Reminds me of a classy tea party 🫖


21 Comments
It came out excellent, no notes other than practice will make it better, but that’s not a criticism. Great job!
This looks absolutely beautiful!! Great job!
Very nice, love the colours and the flowers.
Nice, clean, not overdone. It looks well edited.
It’s beautiful.. You’ve made a cake that you deserve to be very proud of. Your granddaughter will love it!
Very pretty. Lovely flowers
I’d say you nailed it
Seriously good job
This is a pastel dream!!! I love it and would love to live on this cake.
Lovely!
Well done!
Very beautiful and amazingly done for a first attempt! You’re a pro 😍😍💙
Beautiful job!
This looks amazing OP! Your granddaughter will be super excited! You are very talented!
Pastry chef/baker with 40 years experience.
You did a fantastic job, but I’m answering your call for tips/tricks, so here does.
1. Frosting. Your frosting looks pretty spot on except at the top edge. If you are going to have a bare top edge on a cake, the frosting has to be absolutely perfect and even, as if the bc was sprayed on.
2. Borders. When you make the borders for the top and/or bottom of the cake, consistency is key. Whether using a star tip or a drop flower tip, each component has to be the same height and width as the one before. I love the dainty border on the bottom, but I’d like to see you bump up your skills to make the little drop flowers more even.
3. String/ribbon work. I am very impressed with your ribbonwork on this. Did you use a rose tip? Great job. Once again, you are aiming for consistency, this time in pressure when applying the ribbon. I hope you continue to work on this, because you have natural skill with this. But a tube cake pan, turn it upside down, and use that to practice on.
4. Roses. Your roses are pretty well made, but you’ll notice that they are sunken in the middle. I suggest using a 104 rose tip and a size 7( I think) rose nail. Using your bag with the rose tip, pipe a tight but medium size blob of bc on the nail. Now imagine you’re looking at a click, and where the numbers are on that clock, okay? Hold the bag with the bottom of the rose tip pointing at 7 o’clock. Pipe a tight cone on that bc blob. Make sure it has a small opening at the top. This is the middle of your rose, and it will be the highest part of your flower. The next row of petals only gets 3 petals, and you will hold your tip at the 8 to 8:30 position. Next row gets 5 petals, holding your tip at the 9 o’clock position. Your final row of 7-8 petals will be piped holding the tip at the 9:30 position. Now you can add or subtract rows of petals to make larger or smaller roses, and they will have the dimension needed.
5. Leaves/stems. I really like a few leaves added unless the entire top of the cake is covered in flowers. I exclusively use a number 32 leaf tip, and for stems, I use a 3,4,or 5 tip.
I wish you luck, and remember to have fun!
You made a beautiful cake
I gotta say, great job on the colors.
I find a lot of the time I over-saturate them, or make them too dark.. and elegant flowers simply come out too cartoony and fake. Those look quite soft/pale and real.
It’s super clean.
She’s lucky to have you make that for her!
That is beautiful!
First serious victory.
It’s beautiful 😍 I love it!! Reminds me of a classy tea party 🫖
Lovely