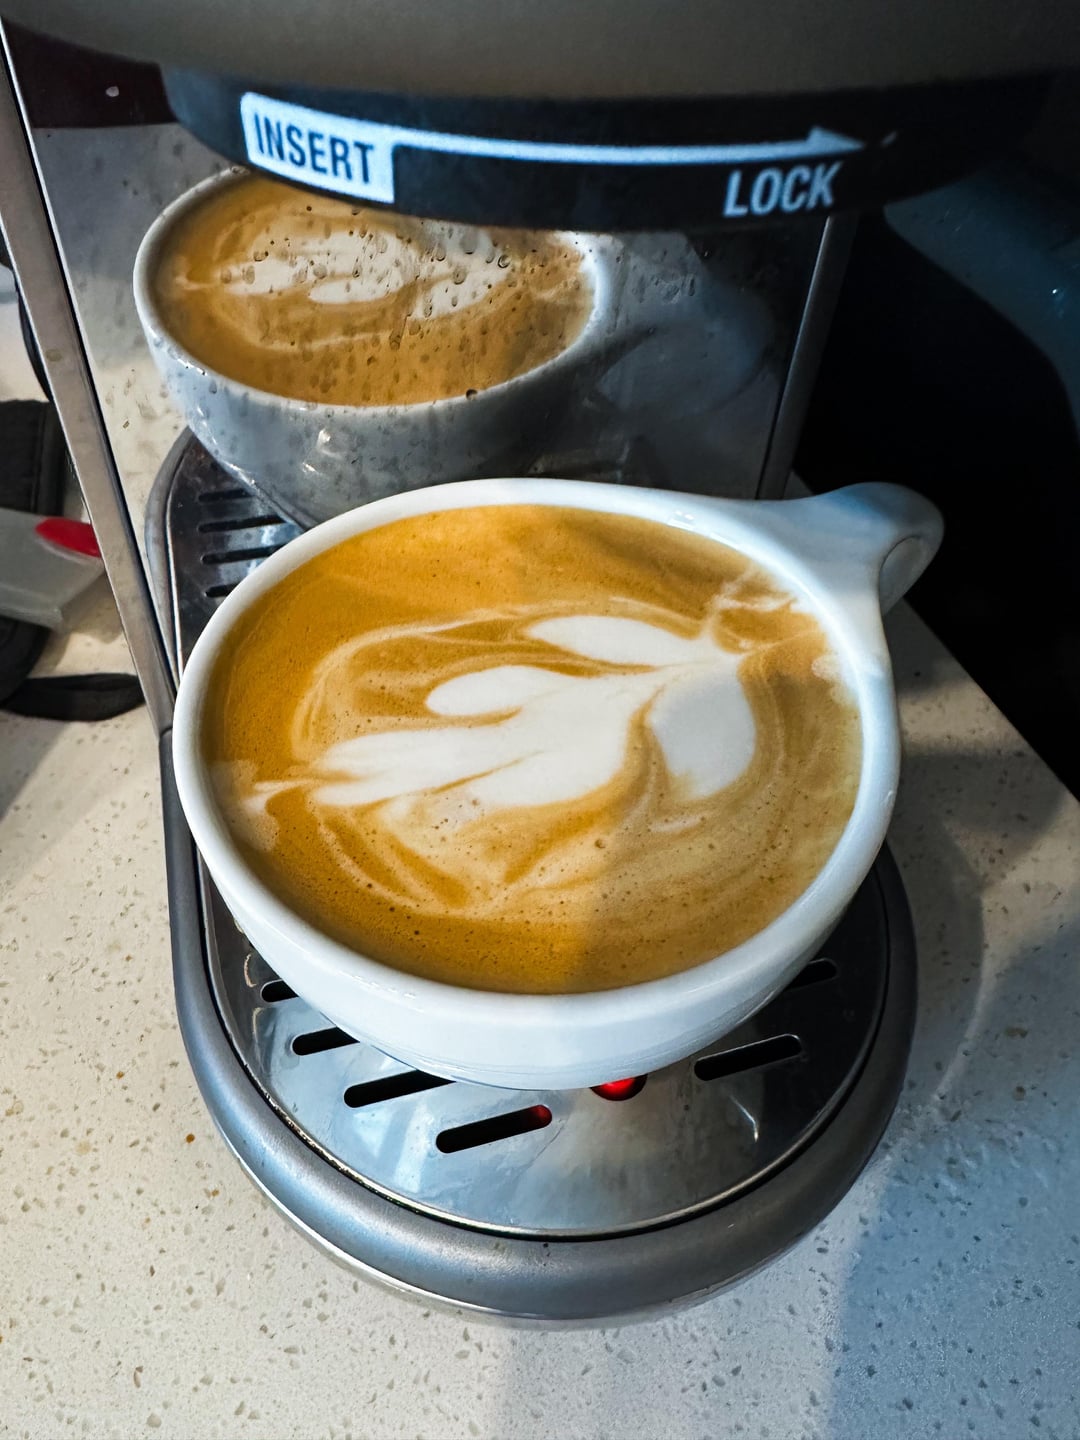
I’ve been working on my latte art skills, but I just can’t seem to get it right. Oftentimes, I end up with jagged edges even though the milk seems to have the right texture. What am I doing wrong?
by punk_off
17 Comments
iSpaYco
my guess is you’re going too fast
video would be better to analyze.
EmynMuilTrailGuide
You could save yourself all this stress by drinking it.
Pax280
r/latteart has lots of experts on this topic Don’t know how long you’ve been trying but art progress is more often than not, measured in months and years, not days and weeks.
Your non-coffee enthusiast friends will be impressed.
Pax
-CoffeeRoaster
Any number of things *could* be something you’re doing wrong. But one for sure thing I’m seeing an issue with is your pull through. After nailing that top heart, be sure to really lift your pitcher before pulling through. Leaving it too low continues to add foam to the top, and massively drags the existing stacks along with it. Other than that, keep on trying! You’re not doing poorly by any means, I’ve been to several (and I mean *several*) specialty cafes that don’t train too heavily on art and put out latte art on par with this pour.
If you want nitpicky answers, I’d suggest giving it just a hint less aeration. Thinner milk texture can provide you the means for much more pliable and workable stacks. Your texture isn’t bad, but it could be thinner.
nitrous642
Just keep practicing you are literally 90% there
Expensive_Recording7
Third picture bottom cup. Looks like you had nice milk here. No idea what is wrong as you only provided pictures.
What I would recommend is a different shape. Heart is what you want to go for. Big nice symmetrical heart.
If you can consistently do that you can move on to a heart in a heart. Or even rosetta.
Then steaming. Again I can not judge from the photo itself. But making a video and buying yourself a thermometer for milk could make a difference. You should aim for around 60 degrees celsius. Mind you that using you hand until “its too hot to touch” I’ve seen people come up with anything between 40-80.
Once you’re more experience you’ll be able to eyeball it if you always work on the same machine.
Yeah and in the end try latte art but please enjoy your drink regardless of the “picture” on top. People often get so obsessed by latte art, extraction times, only using speciality coffee beans from the one hipster roastery behind two corners of their town that they forget to actually sit down. sip on that cup and have the 5 nice minutes for themselves.
OMGFdave
Aim for glossy milk rather than foamy milk.
Also, join r/latteart and tap the community there for assistance.
ZookeepergameNext627
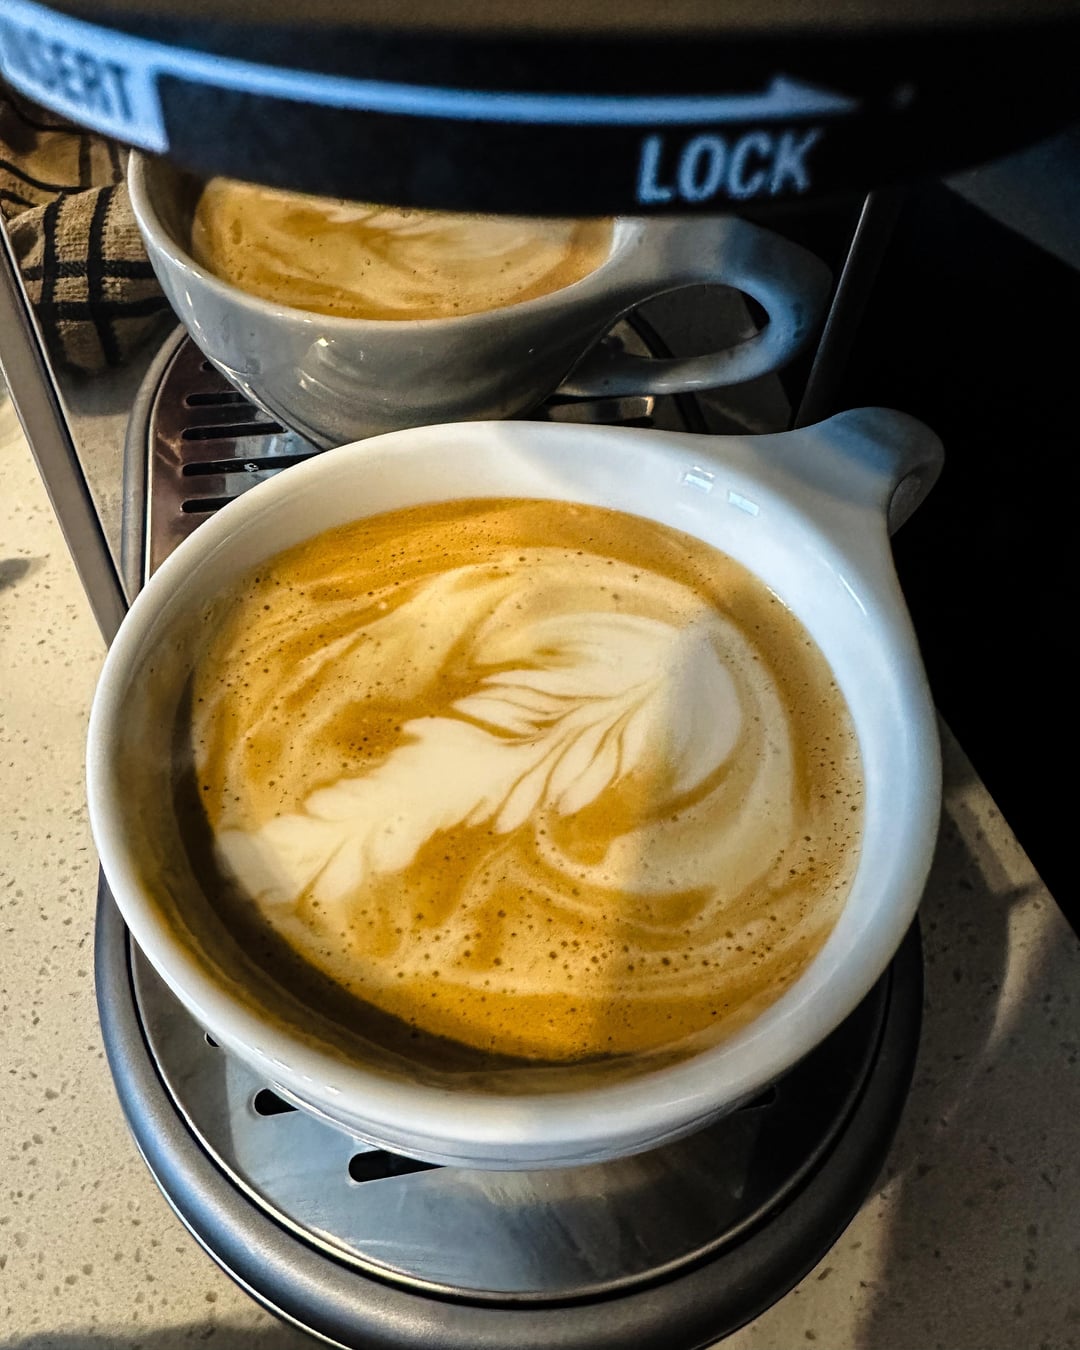
Hi folks I’m new here, but I am curious what is that thing that the lattes are sitting on? It looks like something that would keep them warm is that what it is? And if so where can I get one? Thanks
ratherlargepie
Looks like alt milk? If not—too hot and overstretched.
Advanced_Show9555
Get real! Drink it don’t you have more important things to worry about than your design on top of a latte!?
Kleptowizard
Do you hold the cup on the air, or do you stabilise it on a surface?
Do you tilted the cup and slowly flatten out as the liquid reaches the lip ?
Your texturing looks a little heavy but not over the top. Keep it moving. If you keep the milk moving, it keeps the micro bubbles agitated and spread out through the milk, adding to a more consistent pour.
This is blind advice as to see where you are we would need to see a video.
Keep up the good fight 💪
13AnteMeridiem
Help – what am I doing right that this guy is doing wrong so that I could do it wrong too and my late art could like more like his?
Seriously, I know that’s not what you came for, but these look great. ❤️
turbogomboc
To figure out whats wrong, try going into both extremes and observe how the results change. Aerate longer (like a solid 5-8 seconds longer), then try one when you aerate shorter etc.
My personal guess is that you dont aerate long enough, so while you do get microfoam its not enough and the majority of the milk stays liquid. So when you pour, the liquid milk messes up the foam structure. If you add more bubbles, swirl the jar longer to mix it all up (until the top looks shiny smooth) so that the steamed result is more uniform as you pour it, instead of lots of milk with some microfoam on top.
itistimbo
You’re putting milk in your espresso
1_superstar
You’re doing very well especially considering you use a home machine!
Size of your design and balance looks very good. The earlier you start, the bigger the design, in general.
Having a smoother and glossier milk texture with less froth would create smoother pattern especially where you need more spread, like the first stack of tulip or the bottom part of rosetta. This can also be improved by having more momentum, meaning, from the beginning when milk touches the espresso, to the finish when you stop pouring, you’re continuously moving and tilting your jug (and the cup of course).
Think of it as if you’re moving the entire amount of milk with the espresso. It helps to have just enough milk for the cup as it results having less space between milk and coffee (your jug spout can get closer to the surface) which also reduces the grey part like seen in your last photo.
Make sure you mix the espresso and milk very well to create a smooth canvas, this will reduce the crack (the white strokes around the design) created from your milk stream. Move your cup and jug in same circular motions to incorporate and smoothen everything together.
The steam wand does 3 things. Heating milk, frothing milk, and smoothening milk. And this has to be done in the correct order, in order to have smooth and glossy milk texture. Froth your milk as early as possible – this is when you hear the sizzling sound as the steam hole interacts with the surface of milk – so that you have sufficient time after, to smoothen everything together to bring the milk to be ready to be poured straight away. The froth particles are still large the moment you froth the milk, which is why you do it early to have more time after to smoothen and incorporate everything.
Happy pouring : ) from the master
SallouZilla
Try a milk with more fat content
trifidpaw
I reckon you’re super close to having it, keep practicing!
Are you using full fat whole milk? That’s the easiest to learn with. You want it to look like white paint.
Putting a drop of fairy liquid into water and steaming that can be useful for getting texture. A soy sauce base can be poured into for practicing art as well 🙂


17 Comments
my guess is you’re going too fast
video would be better to analyze.
You could save yourself all this stress by drinking it.
r/latteart has lots of experts on this topic Don’t know how long you’ve been trying but art progress is more often than not, measured in months and years, not days and weeks.
Your non-coffee enthusiast friends will be impressed.
Pax
Any number of things *could* be something you’re doing wrong. But one for sure thing I’m seeing an issue with is your pull through. After nailing that top heart, be sure to really lift your pitcher before pulling through. Leaving it too low continues to add foam to the top, and massively drags the existing stacks along with it. Other than that, keep on trying! You’re not doing poorly by any means, I’ve been to several (and I mean *several*) specialty cafes that don’t train too heavily on art and put out latte art on par with this pour.
If you want nitpicky answers, I’d suggest giving it just a hint less aeration. Thinner milk texture can provide you the means for much more pliable and workable stacks. Your texture isn’t bad, but it could be thinner.
Just keep practicing you are literally 90% there
Third picture bottom cup. Looks like you had nice milk here. No idea what is wrong as you only provided pictures.
What I would recommend is a different shape. Heart is what you want to go for. Big nice symmetrical heart.
[Heart](https://youtu.be/d7R0ZO261k0?si=AzeRKs7svg2eJxo_)
If you can consistently do that you can move on to a heart in a heart. Or even rosetta.
Then steaming. Again I can not judge from the photo itself. But making a video and buying yourself a thermometer for milk could make a difference. You should aim for around 60 degrees celsius. Mind you that using you hand until “its too hot to touch” I’ve seen people come up with anything between 40-80.
Once you’re more experience you’ll be able to eyeball it if you always work on the same machine.
Yeah and in the end try latte art but please enjoy your drink regardless of the “picture” on top. People often get so obsessed by latte art, extraction times, only using speciality coffee beans from the one hipster roastery behind two corners of their town that they forget to actually sit down. sip on that cup and have the 5 nice minutes for themselves.
Aim for glossy milk rather than foamy milk.
Also, join r/latteart and tap the community there for assistance.
Hi folks I’m new here, but I am curious what is that thing that the lattes are sitting on? It looks like something that would keep them warm is that what it is? And if so where can I get one? Thanks
Looks like alt milk? If not—too hot and overstretched.
Get real! Drink it don’t you have more important things to worry about than your design on top of a latte!?
Do you hold the cup on the air, or do you stabilise it on a surface?
Do you tilted the cup and slowly flatten out as the liquid reaches the lip ?
Your texturing looks a little heavy but not over the top. Keep it moving. If you keep the milk moving, it keeps the micro bubbles agitated and spread out through the milk, adding to a more consistent pour.
This is blind advice as to see where you are we would need to see a video.
Keep up the good fight 💪
Help – what am I doing right that this guy is doing wrong so that I could do it wrong too and my late art could like more like his?
Seriously, I know that’s not what you came for, but these look great. ❤️
To figure out whats wrong, try going into both extremes and observe how the results change. Aerate longer (like a solid 5-8 seconds longer), then try one when you aerate shorter etc.
My personal guess is that you dont aerate long enough, so while you do get microfoam its not enough and the majority of the milk stays liquid. So when you pour, the liquid milk messes up the foam structure.
If you add more bubbles, swirl the jar longer to mix it all up (until the top looks shiny smooth) so that the steamed result is more uniform as you pour it, instead of lots of milk with some microfoam on top.
You’re putting milk in your espresso
You’re doing very well especially considering you use a home machine!
Size of your design and balance looks very good. The earlier you start, the bigger the design, in general.
Having a smoother and glossier milk texture with less froth would create smoother pattern especially where you need more spread, like the first stack of tulip or the bottom part of rosetta. This can also be improved by having more momentum, meaning, from the beginning when milk touches the espresso, to the finish when you stop pouring, you’re continuously moving and tilting your jug (and the cup of course).
Think of it as if you’re moving the entire amount of milk with the espresso. It helps to have just enough milk for the cup as it results having less space between milk and coffee (your jug spout can get closer to the surface) which also reduces the grey part like seen in your last photo.
Make sure you mix the espresso and milk very well to create a smooth canvas, this will reduce the crack (the white strokes around the design) created from your milk stream. Move your cup and jug in same circular motions to incorporate and smoothen everything together.
The steam wand does 3 things. Heating milk, frothing milk, and smoothening milk. And this has to be done in the correct order, in order to have smooth and glossy milk texture. Froth your milk as early as possible – this is when you hear the sizzling sound as the steam hole interacts with the surface of milk – so that you have sufficient time after, to smoothen everything together to bring the milk to be ready to be poured straight away. The froth particles are still large the moment you froth the milk, which is why you do it early to have more time after to smoothen and incorporate everything.
Happy pouring : ) from the master
Try a milk with more fat content
I reckon you’re super close to having it, keep practicing!
Are you using full fat whole milk? That’s the easiest to learn with. You want it to look like white paint.
Putting a drop of fairy liquid into water and steaming that can be useful for getting texture. A soy sauce base can be poured into for practicing art as well 🙂